Table of Contents
Want to boost your LGA 1151 PC’s performance but don’t know where to start? This socket remains one of the most popular upgrade choices thanks to its wide selection of compatible processors and affordable prices on the used market.
LGA 1151 (Socket H4) supports Intel processors from 6th to 9th generation — from Skylake to Coffee Lake Refresh. Throughout this platform’s lifespan, dozens of upgrade options have emerged: from simple swaps to more powerful retail processors to installing rare engineering samples adapted for LGA1151.
In this guide, you’ll learn:
- Everything about official and unofficial CPU compatibility with motherboards
- 3 upgrade levels: from simple to extreme + one secret processor
- Which processors deliver maximum performance gains
- How to avoid common LGA1151 upgrade mistakes
What You Need to Know About LGA1151
Revisions
Unlike most previous Intel sockets, 1151 has 2 versions, unofficially called 1151 v1 and 1151 v2. While both revisions share identical pin count and layout, they’re electrically incompatible (officially — we’ll discuss unofficial compatibility later). Socket 1151 v1 supports 6th and 7th gen processors (Skylake and Kaby Lake), while 1151 v2 supports 8th and 9th gen (Coffee Lake and Coffee Lake Refresh).
Chipsets
For desktop boards, Intel released 11 chipsets in the 100 and 200 series (1151 v1) and 8 chipsets in the 300 series (1151 v2).
| Chipset | LGA1151 Generation | Segment | CPU Overclocking | Memory Overclocking | BCLK Overclocking | SATA 6G Ports | USB 3.0/3.1 Ports | Max DDR4 (JEDEC) | Max DDR4 (OC) |
|---|---|---|---|---|---|---|---|---|---|
| H110 | v1 (6-7th gen) | Ultra Budget | No | No | No | 4 | 4 | DDR4-2133 | DDR4-2133 |
| H310 | v2 (8-9th gen) | Ultra Budget | No | No | No | 4 | 5 | DDR4-2666 | DDR4-2666 |
| B150 | v1 (6-7th gen) | Budget | No | No | No | 6 | 6 | DDR4-2133 | DDR4-2133 |
| B250 | v1 (6-7th gen) | Budget | No | Limited | No | 6 | 6 | DDR4-2400 | DDR4-2666 |
| B360 | v2 (8-9th gen) | Budget | No | Limited | No | 6 | 6 | DDR4-2666 | DDR4-2933 |
| H170 | v1 (6-7th gen) | Mainstream | No | No | No | 8 | 8 | DDR4-2133 | DDR4-2133 |
| Q150 | v1 (6-7th gen) | Business | No | No | No | 8 | 8 | DDR4-2133 | DDR4-2133 |
| Q170 | v1 (6-7th gen) | Business+ | No | No | No | 8 | 8 | DDR4-2133 | DDR4-2133 |
| Z170 | v1 (6-7th gen) | Enthusiast | Yes | Yes | Yes | 8 | 8 | DDR4-2133 | DDR4-4000+ |
| H270 | v1 (6-7th gen) | Mainstream | No | Limited | No | 8 | 8 | DDR4-2400 | DDR4-2666 |
| Q250 | v1 (6-7th gen) | Business | No | No | No | 8 | 8 | DDR4-2400 | DDR4-2400 |
| B365 | v2 (8-9th gen) | Budget+ | No | Limited | No | 6 | 8 | DDR4-2666 | DDR4-2933 |
| H370 | v2 (8-9th gen) | Mainstream | No | Limited | No | 8 | 8 | DDR4-2666 | DDR4-2933 |
| Q270 | v1 (6-7th gen) | Business+ | No | No | No | 8 | 8 | DDR4-2400 | DDR4-2400 |
| Z270 | v1 (6-7th gen) | Enthusiast | Yes | Yes | Yes | 8 | 8 | DDR4-2400 | DDR4-4200+ |
| Q370 | v2 (8-9th gen) | Business | No | No | No | 8 | 8 | DDR4-2666 | DDR4-2666 |
| Z370 | v2 (8-9th gen) | Enthusiast | Yes | Yes | Yes | 6 | 6 | DDR4-2666 | DDR4-4000+ |
| Z390 | v2 (8-9th gen) | Enthusiast | Yes | Yes | Yes | 6 | 8 | DDR4-2666 | DDR4-4400+ |
Your board’s chipset is critically important — it determines not only the number of modern ports but also overclocking capabilities. Additionally, entry-level chipset boards typically lack robust power delivery systems, which will also limit your potential processor choices.
Overclocking
Full multiplier overclocking for retail models is only possible with K-series processors and Z-chipset boards.
Although the socket’s early days offered BCLK overclocking for locked Skylake processors, this functionality is unlikely to be relevant today.
Upgrade Preparation: What You Need to Know
Since this article focuses on upgrades, we’ll assume you already have some system, or at minimum an LGA1151 motherboard.
Preparation Steps
- Identify your motherboard model — this determines your maximum processor
- Research the chipset — understand your future system’s capabilities
- Assess technical skills — check your readiness for BIOS modifications, pin mods, programmer work
- Plan your budget — LGA 1151 offers upgrade options from tens to hundreds of dollars
How to Identify Your LGA1151 Motherboard Model
Software Method (Most Reliable)
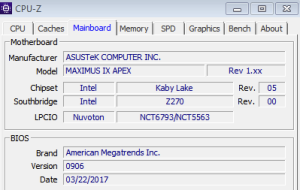
CPU-Z (Recommended):
- Download from cpuid.com
- Launch → “Mainboard” tab
- Check “Manufacturer” + “Model”
Alternatives: AIDA64, Speccy, HWiNFO64.
BIOS/UEFI Method
- Press Del/F2/F12 during boot
- Model displayed in main menu or “System Information”
Visual Inspection
Look for printed text on the motherboard:
- Between RAM slots and CPU socket
- Near BIOS battery
- Around 24-pin power connector
Note: Software methods are more reliable than visual inspection.
Level 1 – Supported Processors

Difficulty – Easy
The simplest approach is buying the highest-end retail processor your board supports.
No complications here, but it’s the most straightforward method. Just visit the manufacturer’s website and check the highest supported chip. If your board is 1151v2, there’s a good chance the processor is still available retail. For 1151v1 boards, you’ll need to shop on AliExpress or eBay.
Maximum complexity – you might need to flash a newer BIOS version.
Level 2 – Unsupported but Compatible
Difficulty: Medium-High
The idea of creating two incompatible versions of the same socket didn’t sit well with everyone. Since both 1151 versions are physically identical, enthusiasts immediately began experimenting, discovering the connectors aren’t as incompatible as claimed. Through some CPU contact and motherboard BIOS manipulations, you can run Coffee Lake (Refresh) processors on any 100 or 200 series chipset board while maintaining Skylake and Kaby Lake compatibility. This motherboard modification (for 100 and 200 series chipsets) and custom BIOS flashing became known as the “Coffee Mod.” While the modification process isn’t simple, it allows full functionality of Coffee Lake processors with some caveats.
Coffee mod is especially popular among quality Z170 board owners. Motherboards with solid power delivery can handle high-end 8th and 9th gen processors without issues.
We cover coffee mod in detail in a separate article, but here’s an overview of required steps:
- Backing up your original board BIOS
- Determining 8th/9th gen processor revision — this determines pin mod necessity
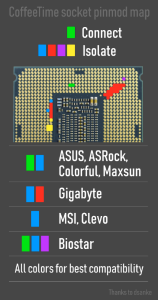
- Pin mod — isolating and/or connecting contacts on the processor’s underside using Kapton tape, conductive tape, foil, electrical tape, pencil graphite, or regular tape
- Selecting appropriate BIOS version for modification (depends on board model and vendor)
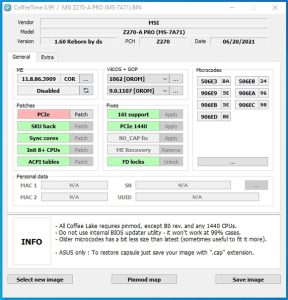
- BIOS modification — typically using the CoffeeTime utility
- Flashing modified BIOS — may require a programmer depending on the board
- Testing and verification
This path has many potential pitfalls, so it’s hardly suitable for beginners.
Level 3 – Experimental Options
Installing Chinese “Frankenstein” processors.
Difficulty: Maximum
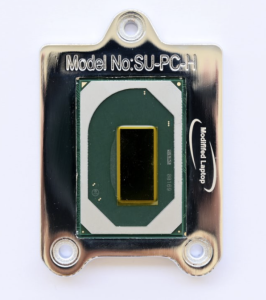
Beyond retail processors, there are many strange Chinese models available. Originally designed for laptops, Chinese engineers created special adapters allowing these chips to work in socket 1151.
These CPUs can feature up to 8 cores and 16 threads, plus unique capabilities (for example, unlocked multiplier models can overclock on any chipset, even H110). This delivers impressive performance levels, but with significant drawbacks: more complex installation, worse compatibility compared to retail models, memory controller issues, and the need to create and flash modified BIOS.
Nevertheless, this offers one of the most interesting price-to-performance ratios. We’ll discuss Frankenstein processors in detail in a separate article.
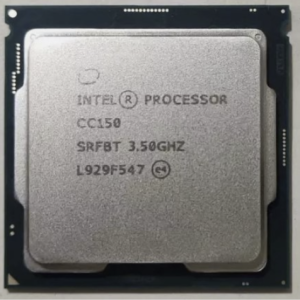
Alternative Option: Intel CC150
CC150 – The GeForce Now server processor.
Intel CC150 — an LGA1151 (v2) processor specifically developed by Intel for GeForce Now cloud gaming servers, later appearing for sale on AliExpress and other marketplaces.
Intel never sold this officially, but it’s a finished product. CC150 works “out of the box” on 1151v2 boards. It can also run on 1151v1 motherboards through coffee mod.
The chip offers balanced (if not maximum) performance while being less demanding on the board’s power delivery system. We discuss CC150 in detail here.
Common Post-Upgrade Issues
One common upgrade mistake is underestimating the cooling requirements of your new processor. The thermal design power (TDP) of your new CPU may significantly exceed your current cooling system’s capabilities. Beyond TDP, consider the manufacturing process node. Processors with identical TDP but different manufacturing processes can vary significantly in heat output. Overclocking pushes heat and power draw up fast.
Basic cooling selection recommendations:
| Processor TDP | Cooling Type | Examples |
|---|---|---|
| Up to 65W | Stock or tower 90-120mm | Intel Stock, Gammaxx 300 |
| 65-95W | Tower 120-140mm | Hyper 212, Arctic Freezer 34 |
| 95W+ | Tower 140mm+ or AIO | Dark Rock 4, Noctua NH-D15 |
When LGA 1151 Upgrades Aren’t Worth It
LGA 1151 processor upgrades aren’t always economically or technically justified. Sometimes moving to a new platform offers more benefits for comparable money:
- If you have one of the weakest motherboards on entry-level chipsets. Installing a powerful CPU on a weak board isn’t ideal. Entry-level boards may lack even basic functionality like memory timing control. If your planned upgrade requires buying both a new board and CPU (essentially building from scratch), consider a newer platform.
- If you already have one of the best processors installed. For example, a Z370 board + Core i7 8700K. You could still improve performance with a more powerful CPU, but you’d see more significant gains by selling your system and investing in a newer socket.
- If you need more modern ports and interfaces. LGA1151 is limited to PCIe 3.0 for modern graphics cards and SSDs, with fewer modern ports than newer systems.
Interactive Test
Coming soon: A test to help you choose the right processor based on your motherboard and technical skills.
