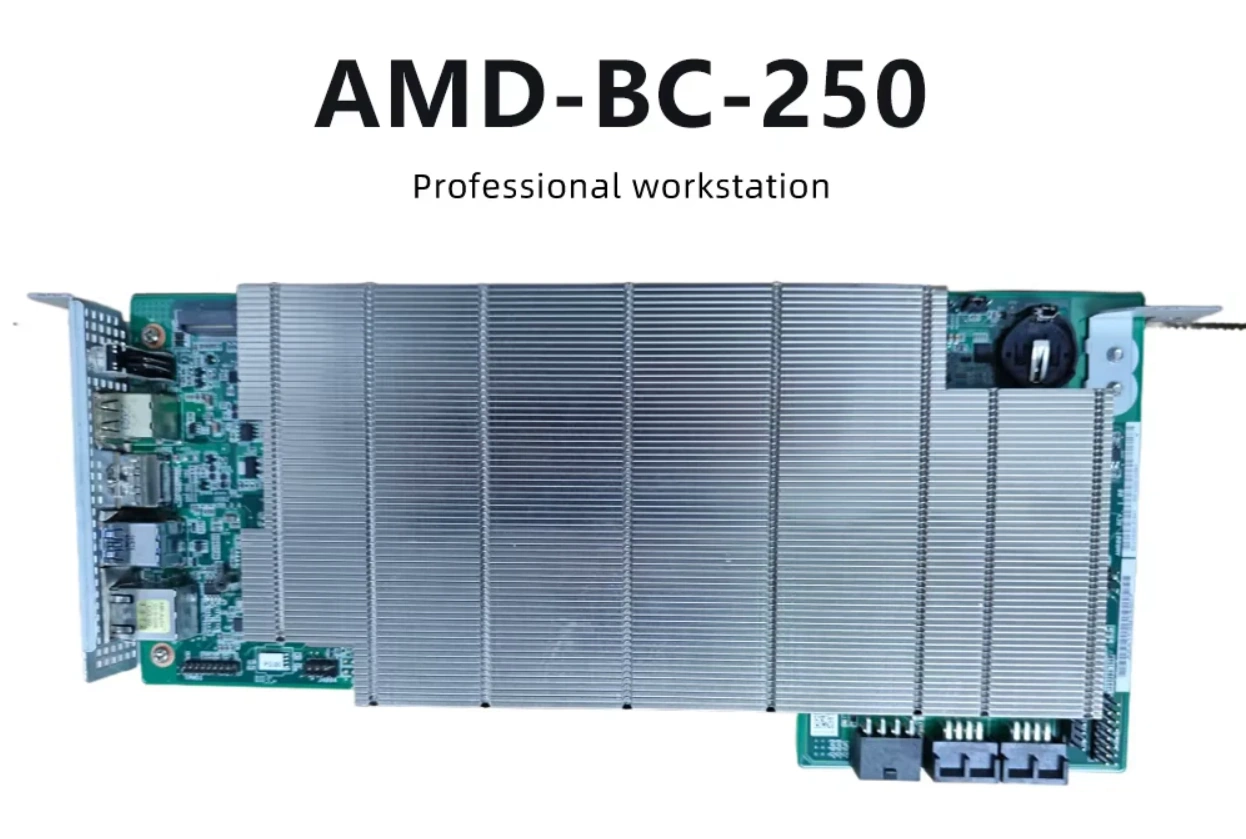
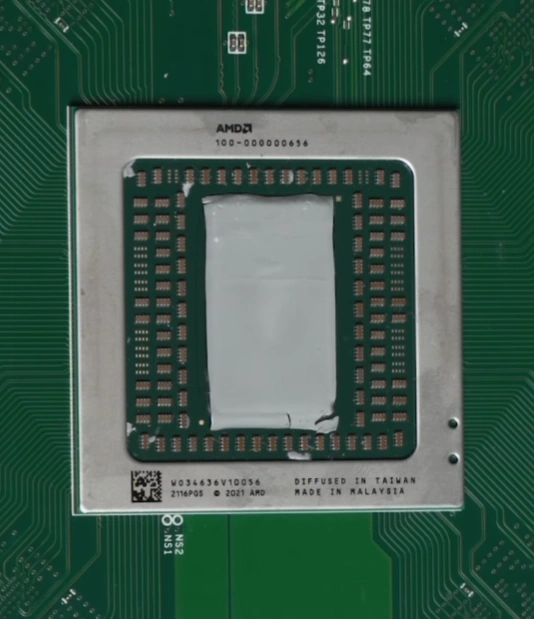
Picture a board the size of a graphics card carrying a PlayStation 5 chip, 16 GB of GDDR6 and an M.2 slot for an SSD. Feed it 12 volts, plug in a monitor and keyboard, and you have a computer that runs Cyberpunk 2077. That’s the AMD BC-250.
The chips on these boards are PS5 dies that failed binning for the console, so only 6 of the 8 CPU cores are enabled and the GPU has noticeably fewer compute units (CUs) than the PS5. In 2022 ASRock started putting the boards into crypto mining rigs, a dozen per chassis, and each one was a complete computer with its own CPU. The rigs didn’t last long. That autumn Ethereum moved to proof of stake, GPU mining stopped making sense, and the boards ended up on secondhand marketplaces as hardware nobody wanted.
Enthusiasts saved them. In 2025 support for the GPU landed in Mesa, the Linux graphics driver stack, games started running, and a bit later the community figured out how to turn the disabled cores and compute units back on. Today a board goes for about $150–200, and a full build around it costs at most half as much as a Steam Machine.
The catch is that it’s a kit. There’s no case and no proper cooling in the box, no Windows graphics driver, the BIOS needs reflashing, and unlocking, undervolting and tuning all take time. That’s exactly why people love it, though: if you enjoy tinkering with hardware, the BC-250 is one of the most interesting finds of the last few years.
Table of Contents
What Is the AMD BC-250
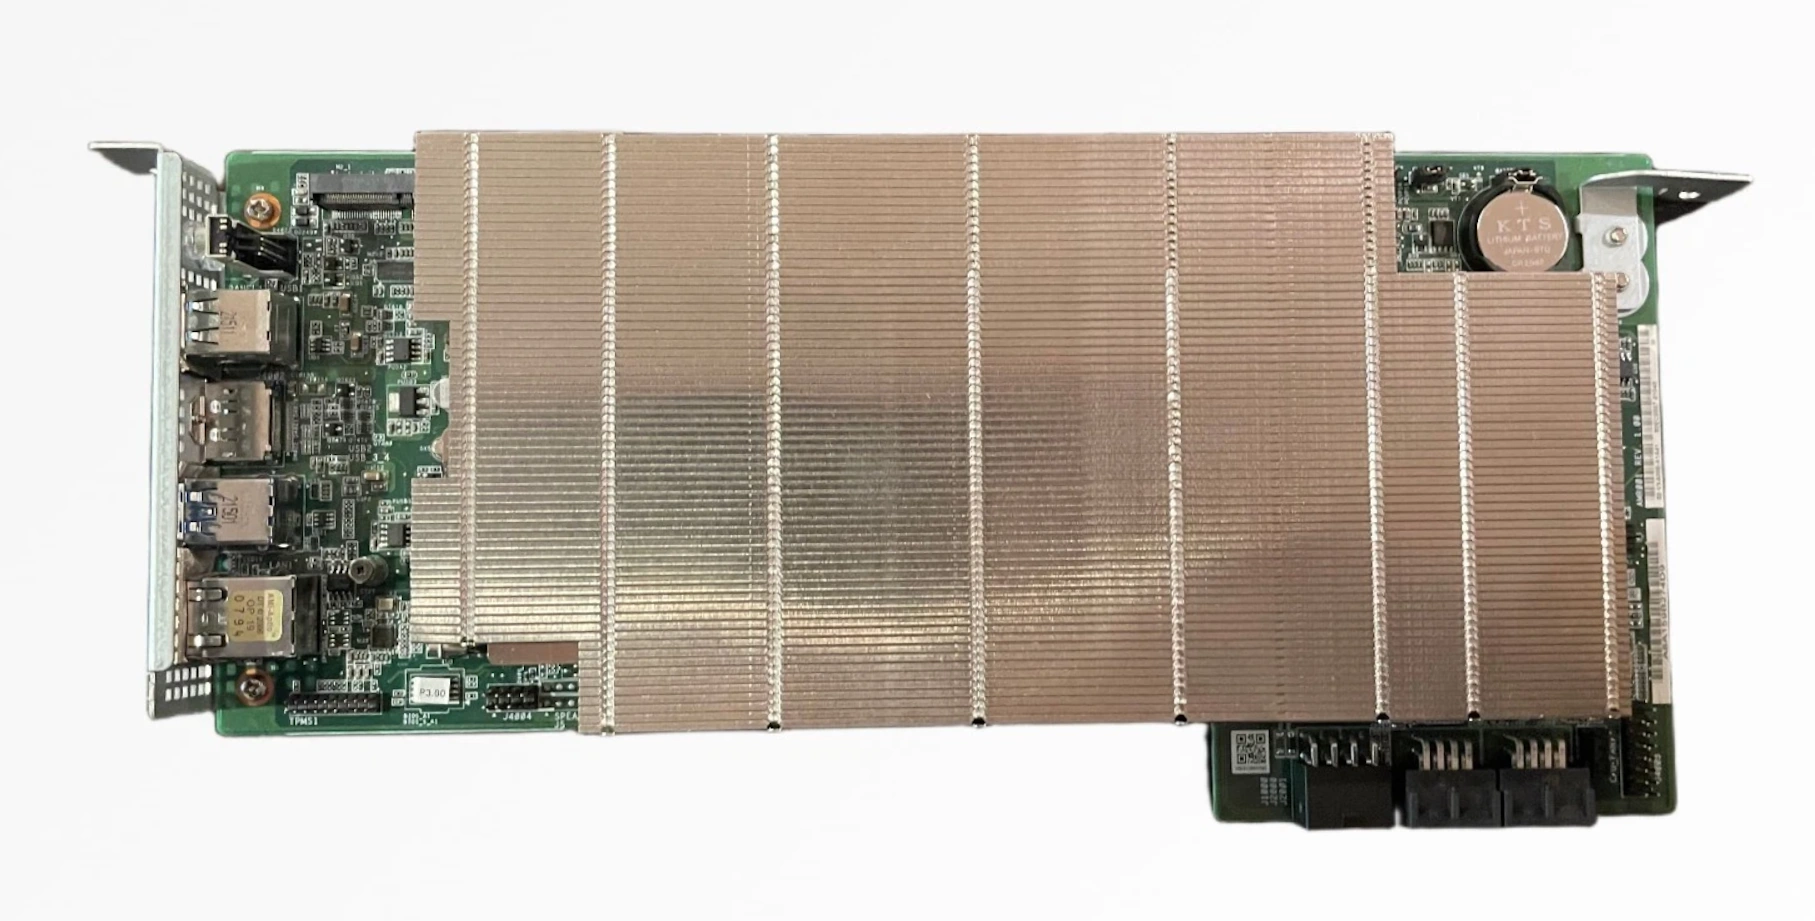
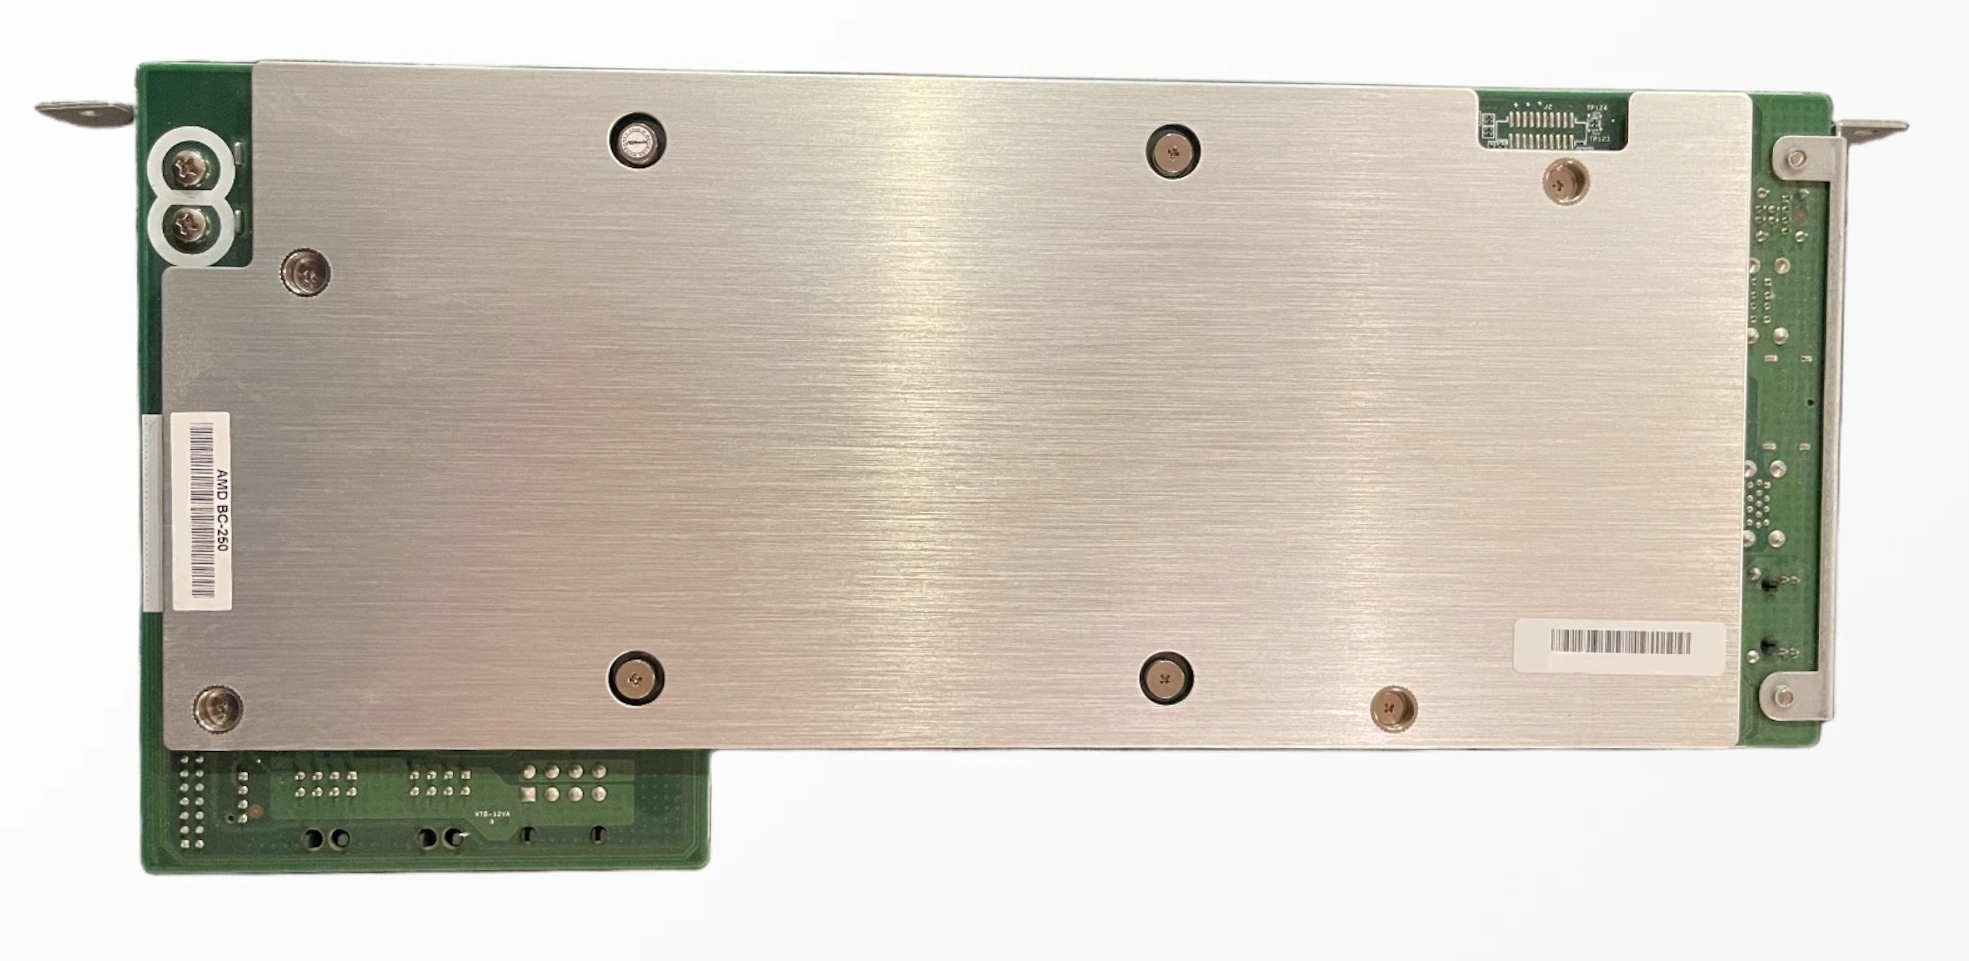
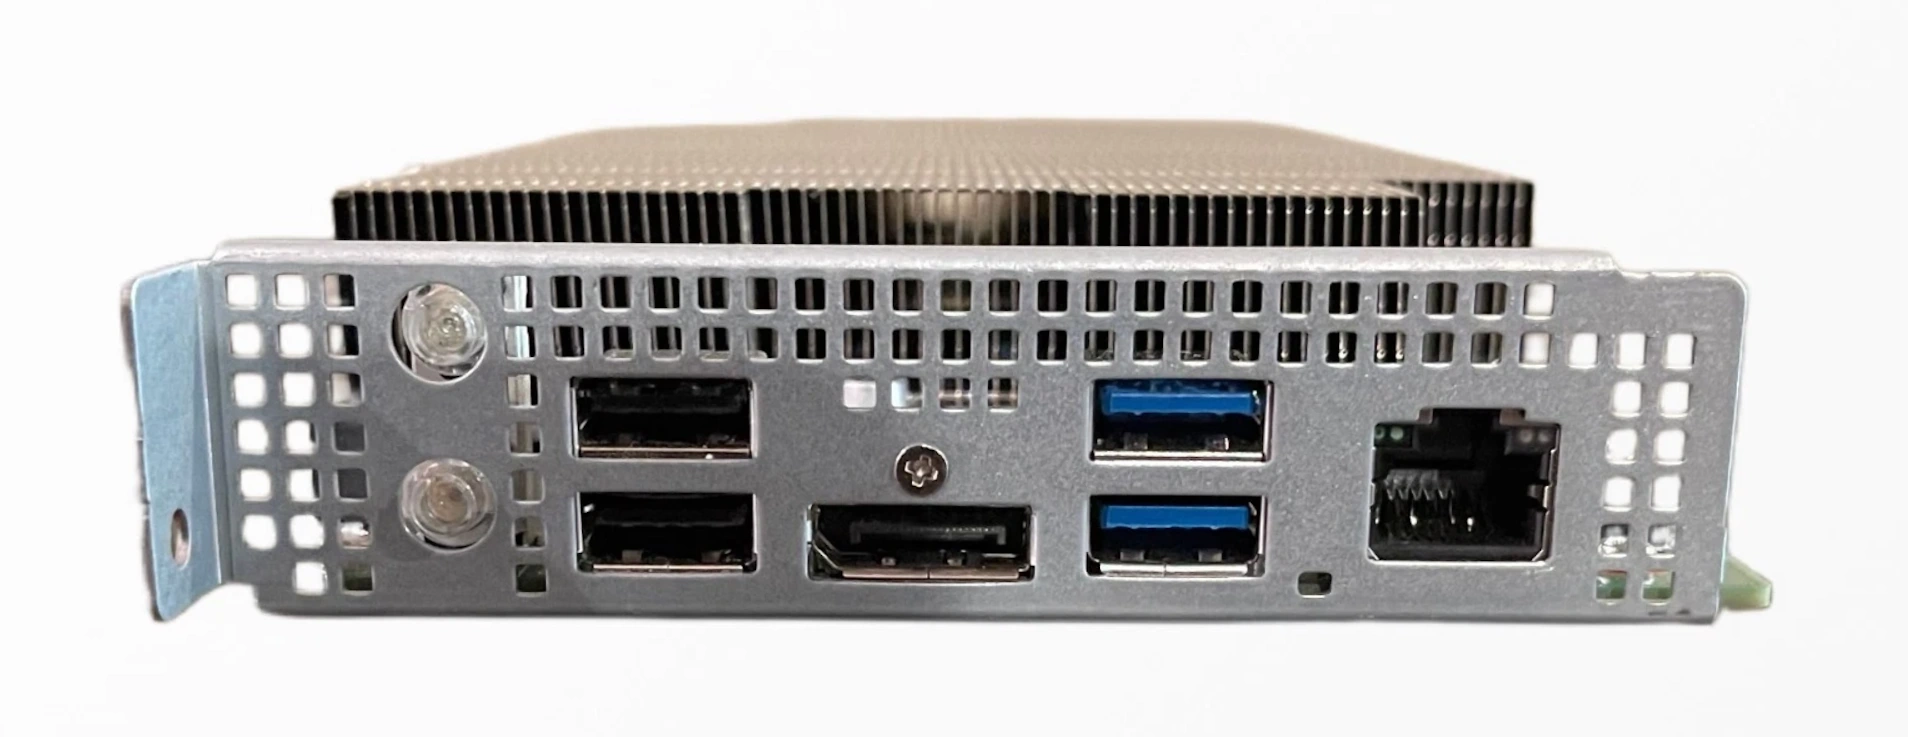
At first glance it’s easy to mistake the BC-250 for a graphics card: a long PCB, a massive passive heatsink, a bracket with ports. In reality it’s a whole computer. The CPU, graphics, memory, SSD slot, network controller and USB all sit on one board. All it’s missing is a power supply and cooling, but more on that later.
At its heart is Oberon, the same die that powers the PS5. This isn’t the first time AMD has found a use for rejected chips: dies with completely dead graphics went into the AMD 4700S desktop kits, while those with at least partly working graphics ended up here. Under Linux the GPU shows up as Cyan Skillfish, and that’s the codename you’ll keep seeing in drivers, logs and forum threads.
Specifications
| Spec | Value |
|---|---|
| CPU | Zen 2, 6 cores / 12 threads (8 cores after unlock), ~3.5 GHz |
| L3 cache | 8 MB (2 × 4 MB) |
| Graphics | Cyan Skillfish (gfx1013), 24 CUs (up to 40 after unlock) |
| GPU clock | 1500 MHz by default, 2000+ MHz with a governor |
| Memory | 16 GB GDDR6, 256-bit, ~448 GB/s, shared by CPU and GPU |
| Storage | M.2 2280 (M-key): NVMe over PCIe 2.0 x2 or SATA III |
| Video output | 1 × DisplayPort 1.4 |
| USB | 2 × USB 3.0, 2 × USB 2.0 |
| Network | Gigabit Ethernet (Realtek RTL8111H), no Wi-Fi or Bluetooth |
| Chipset | AMD A68H (Bolton-D2H) |
| Power input | 12 V only: PCIe 8-pin and two Micro-Fit connectors |
| Power draw | ~60–85 W idle, 160–200 W in demanding games, spikes up to ~235 W |
| Size and weight | about 310 × 115 mm, ~400 g with heatsink |
A few of these rows need some explanation.
- CPU. This isn’t quite the Zen 2 you get in desktop Ryzen chips. Just like in the PS5, the floating-point unit is cut in half. Every instruction, AVX2 included, is still supported and games barely notice, but in heavy math like video encoding or y-cruncher the BC-250 trails a regular Zen 2 by about 15%.
- Storage. The M.2 slot only gets two PCIe 2.0 lanes, so even the fastest NVMe drive tops out around 1 GB/s. That’s enough, but there’s no point paying extra for a high-end SSD.
- Video. The hardware encode/decode block is on the die, and it isn’t even fused off. The driver just doesn’t know how to power it up, so YouTube and movies are decoded on the CPU.
- What about the console’s decompressor? The PS5 has a separate I/O block with a hardware Kraken decompressor that works with the fast SSD to stream in textures without taxing the CPU. Nothing uses it on the BC-250: there are no drivers, PC games don’t know it exists, and the slow M.2 slot couldn’t keep it fed anyway. So data takes the usual PC route, through the CPU.
RDNA 1, RDNA 2 or “RDNA 1.5”? AMD never officially described this GPU, so there’s still no definitive answer. Most reviews call it RDNA 2, like the PS5. But the Linux driver sees the graphics core as GC 10.1.3, which puts it in the Navi 10 generation (RDNA 1, version 10.1.0) rather than RDNA 2 (10.3.x). At the same time, it does have hardware ray tracing from the second generation, while other RDNA 2 features fare worse: VRS is buggy and has to be turned off in some games with a dedicated Vulkan layer, and mesh shader support is something the community is only starting to build on its own. Hence the nickname “RDNA 1.5”. What matters more in practice is that ray tracing here runs in hardware, not emulation. It won’t be fast, but it works.
BC-250 vs PS5
| BC-250 | PlayStation 5 | |
|---|---|---|
| CPU cores | 6 (8 physically) | 8 |
| CPU clock | ~3.5 GHz, fixed | up to 3.5 GHz, variable |
| GPU compute units | 24 (40 physically) | 36 |
| GPU clock | 1500 MHz by default, 2000+ MHz with a governor | up to 2230 MHz |
| Memory | 16 GB GDDR6, 256-bit | 16 GB GDDR6, 256-bit |
| Storage | M.2, PCIe 2.0 x2 (~1 GB/s) | custom SSD, 5.5 GB/s |
| Hardware video decoding | block is there but doesn’t work | yes |
The short version: the memory is identical to the console’s, but the CPU and especially the GPU are cut down. Some of that can be won back, though, as the unlock section explains.
What’s on the Board
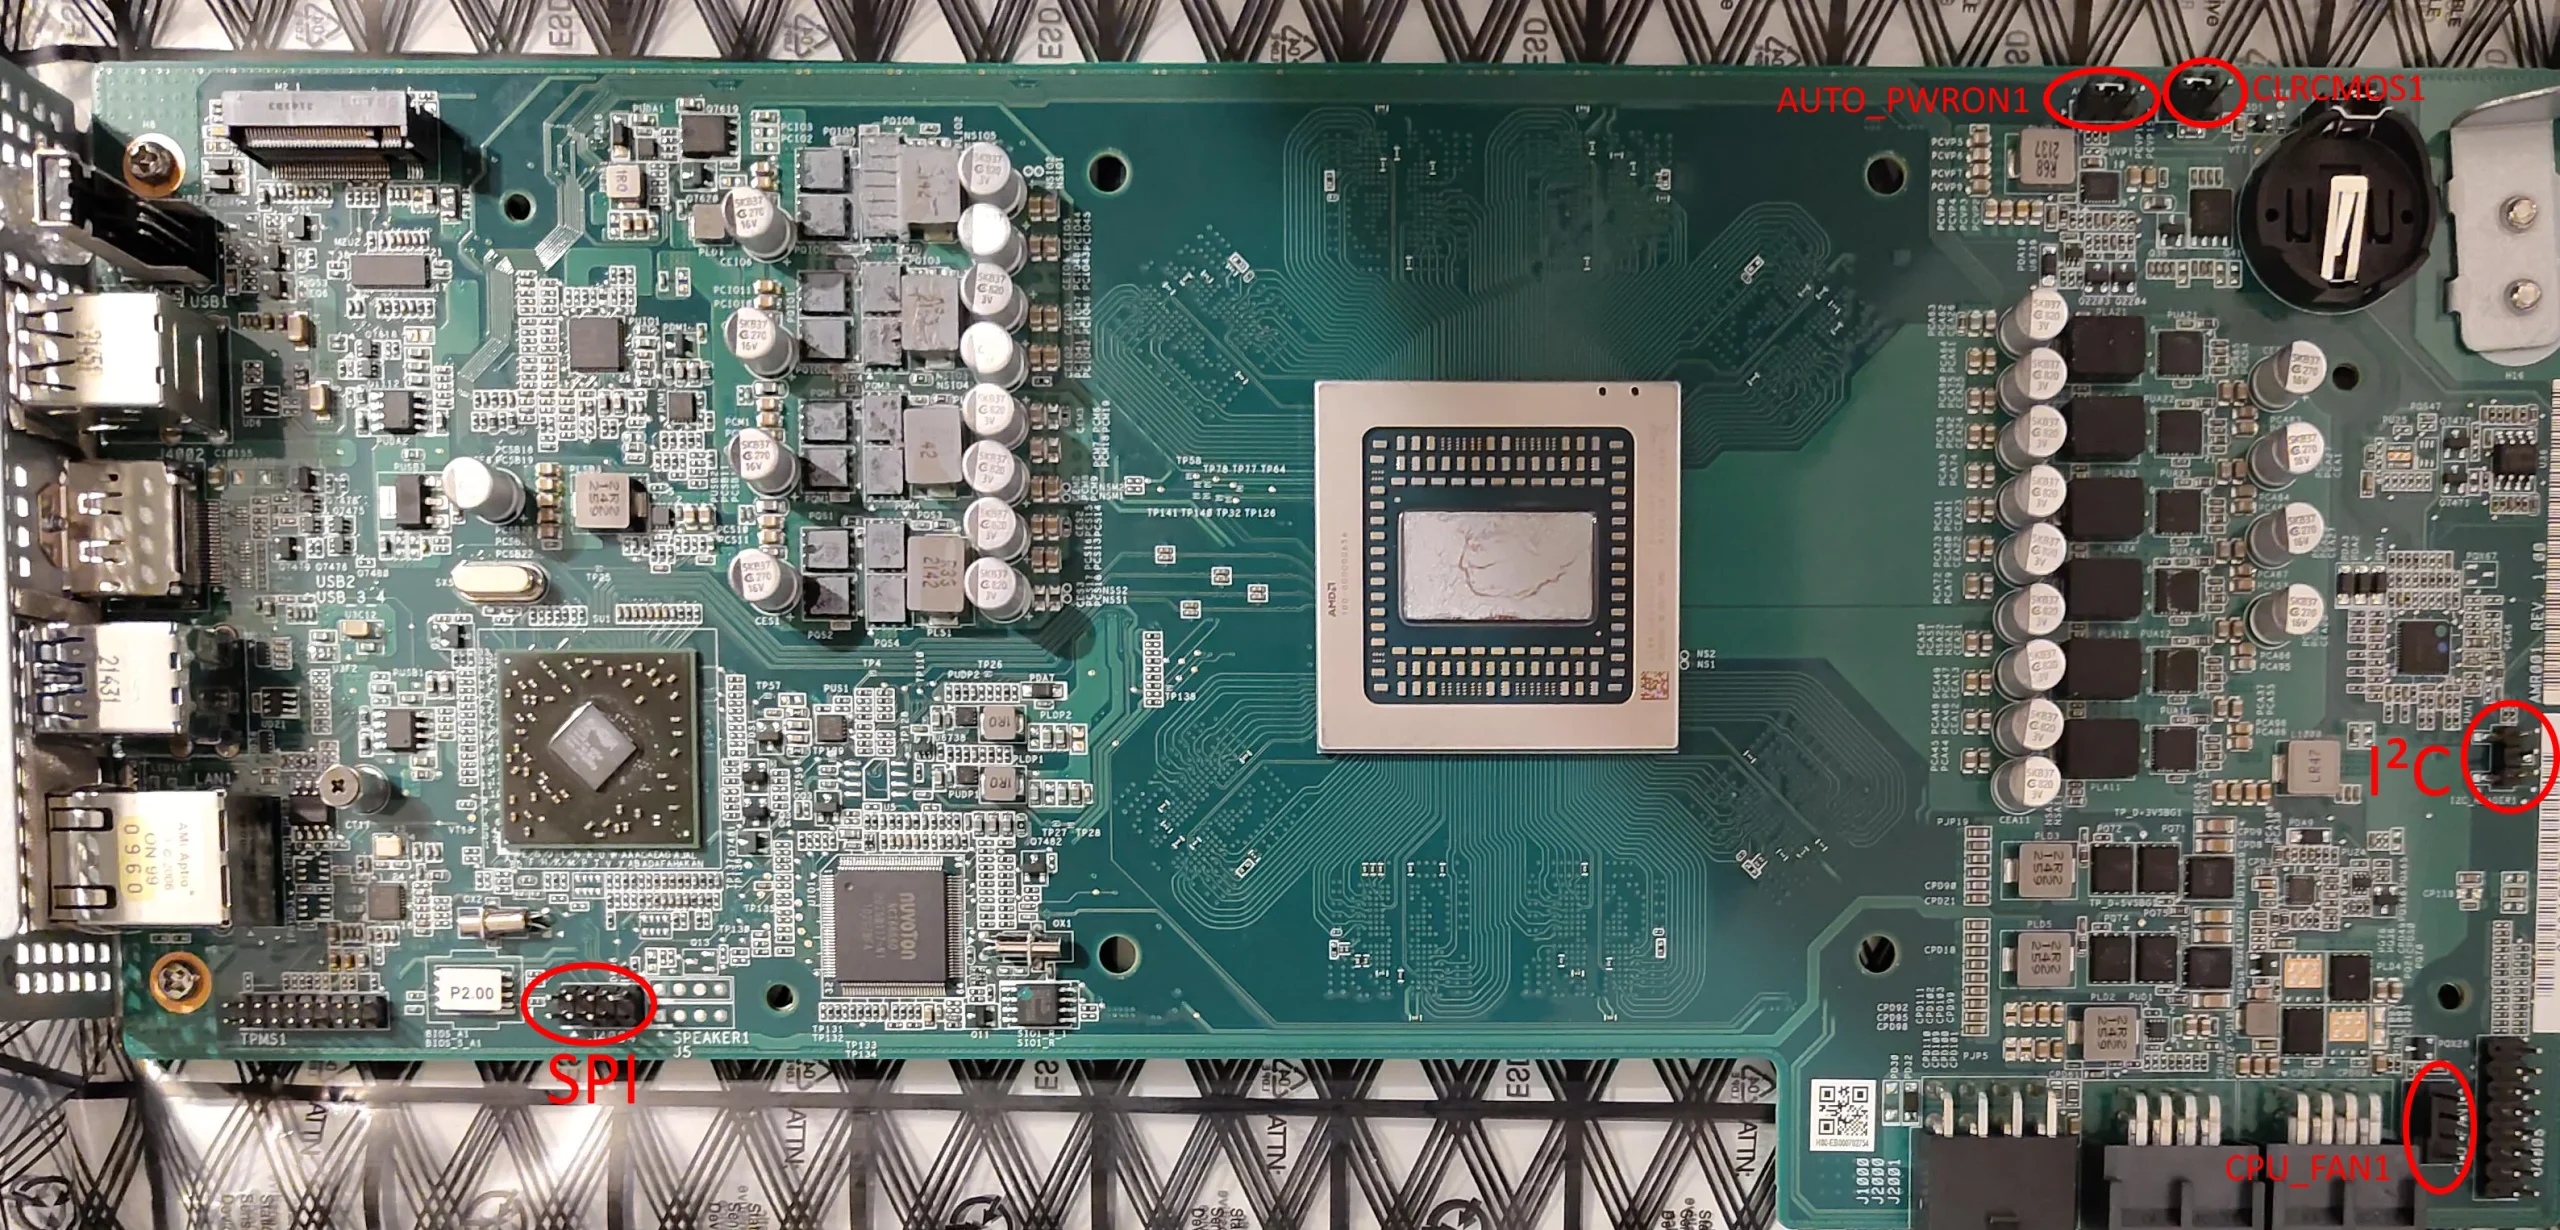
The board has a few connectors and jumpers worth knowing about before you power it on for the first time:
- AUTO_PWRON1. With the jumper on pins 1–2 (the default), the board turns on as soon as it gets 12 V. On pins 2–3 it waits for a button press. The only power button is the one on the board itself; there’s no header for a case button.
- CLRCMOS1. Clears the BIOS settings. You’ll definitely need it after reflashing.
- CPU_FAN1. A standard 4-pin PWM fan header. Next to it is the multi-pin J4003 connector, which drove five 80 mm fans in the server chassis.
- I²C (3 pins: SCL, SDA, GND). Talks to the board’s VRM controllers. Most users will never touch it, but it’s useful if you like digging into voltages.
- SPI header (J4004). For flashing the BIOS with a programmer. One important detail: the board has two flash chips, and only the 16 MB one holds the BIOS. Flash the 512 KB chip that belongs to the SuperIO controller and you’ve got a brick.
- Power. Besides the usual PCIe 8-pin, there are two Micro-Fit connectors (J2000 and J2001). In the mining rig the board was powered through those, and the 8-pin wasn’t the main path. There’s no circuitry for controlling an ATX power supply, so a regular PSU has to be started with a jumper or a switch.
Why the BC-250 Is Worth a Look
Forget the mining past for a moment and the appeal is simple: for the price of one budget graphics card you get an entire computer. The CPU, graphics and memory are already on the board; all you add is a PSU, an SSD and cooling. And what’s inside isn’t some stripped-down office chip but console hardware that game developers have been targeting for years.
Budget discrete GPU performance. Community estimates put a stock BC-250 somewhere between the RX 6600 and RX 6600 XT, and with every compute unit unlocked it reaches RX 6700 territory. That’s plenty for 1080p: most modern games are playable on medium to high settings, especially with FSR.
Fast memory. It’s the same GDDR6 as in the PS5, with around 448 GB/s of bandwidth. You decide how to split it between system RAM and VRAM, and beyond gaming it’s a good fit for running local AI models.
Hidden potential. Two CPU cores and 16 compute units sit dormant on the die, and the community has learned how to wake them up. Nobody can tell you in advance how many will work on your particular board. For a lot of people that’s half the fun, much like the old days of unlocking cores on a Phenom II, flashing a Radeon HD 6950 into a 6970 or turning a GeForce 6800 LE into a full 6800.
A kit with a community behind it. There’s no ready-made case, so people 3D-print them, rework heatsinks, reflash BIOSes and rewire the power setup to suit themselves. You’ll rarely see two identical builds. All of it runs on an active community: thousands of people on Reddit and Discord, plus detailed documentation on GitHub. That’s where the drivers, the unlock and most of the cases covered below came from.
The flip side. There’s no free lunch. The board only fully works on Linux, it’s power-hungry even at idle, and it has no sleep mode at all. Ports are scarce, the 16 GB of memory is shared, and there’s no hardware video decoding. On top of that, it’s used mining hardware with no warranty of any kind, and there’s no telling what shape it’ll arrive in.
Put simply, the BC-250 gives you the most hardware for the least money, but only if you’re willing to put in the work.
Hardware: Power and Cooling
The board itself is only half a computer. The other half, power and cooling, you’ll have to sort out yourself, and this is no place to cut corners.
Power
The BC-250 only needs the 12 V rail; the 3.3 V and 5 V rails go unused. The PSU should deliver at least 20 A on that rail, and for wattage, aim for 300 W or more on a stock board and 400 W or more if you plan to unlock and overclock, since both push power draw up noticeably.
Your options:
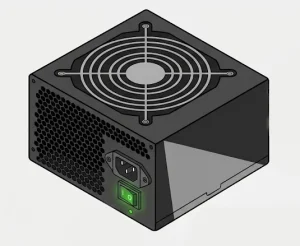
- A regular ATX PSU, 400 W or more. Any decent unit will do, even an old one from the closet. The board can’t control it, so you’ll have to turn it on yourself: short the green PS_ON wire to ground with a jumper or run it to a switch. There are also ready-made adapter boards that switch the PSU on and off together with the board.
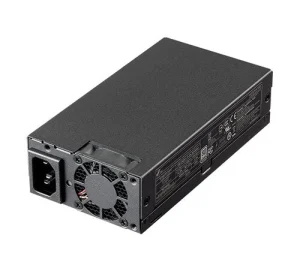
- Flex-ATX, 400–500 W. The most popular choice for compact builds, and many printed cases are designed around it. The FSP500-30AS is considered the gold standard, but there are plenty of cheaper options.
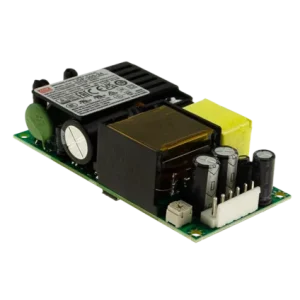
- An industrial 12 V supply. For example, the compact Mean Well LOP series. The LOP-300-12 is the minimum for a stock board; for an unlocked one the community recommends the LOP-400-12. Note that these units only deliver their full rated power with airflow over them.
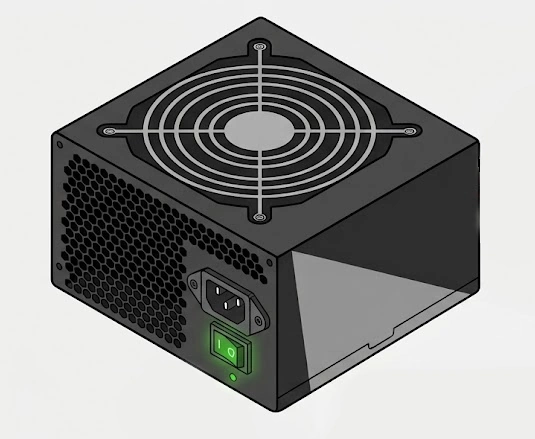
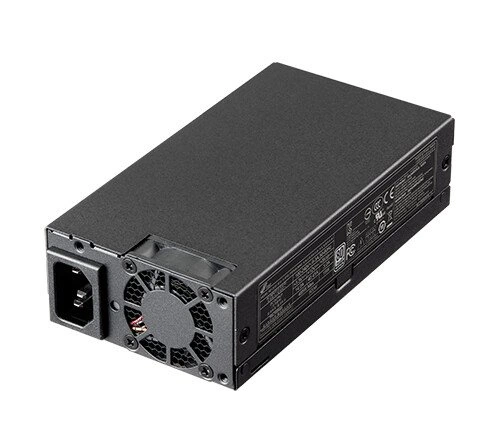
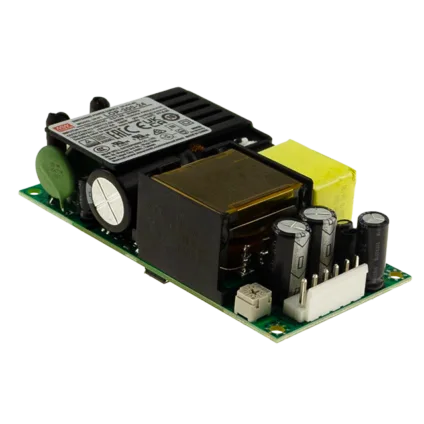
Power goes in through a standard PCIe 8-pin, and the server-style Micro-Fit connectors are there too. By spec, a PCIe 8-pin is rated for 150 W (a quality cable and connector can handle more in practice), which gives you a rule of thumb:
- 8-pin only: stock board and a moderate unlock, up to 40 CUs at around 1500 MHz with no overclock;
- 8-pin plus one Micro-Fit: 40 CUs unlocked with an everyday overclock;
- 8-pin plus both Micro-Fits: maximum overclock and stress tests like FurMark, where draw at the wall goes past 300 W.
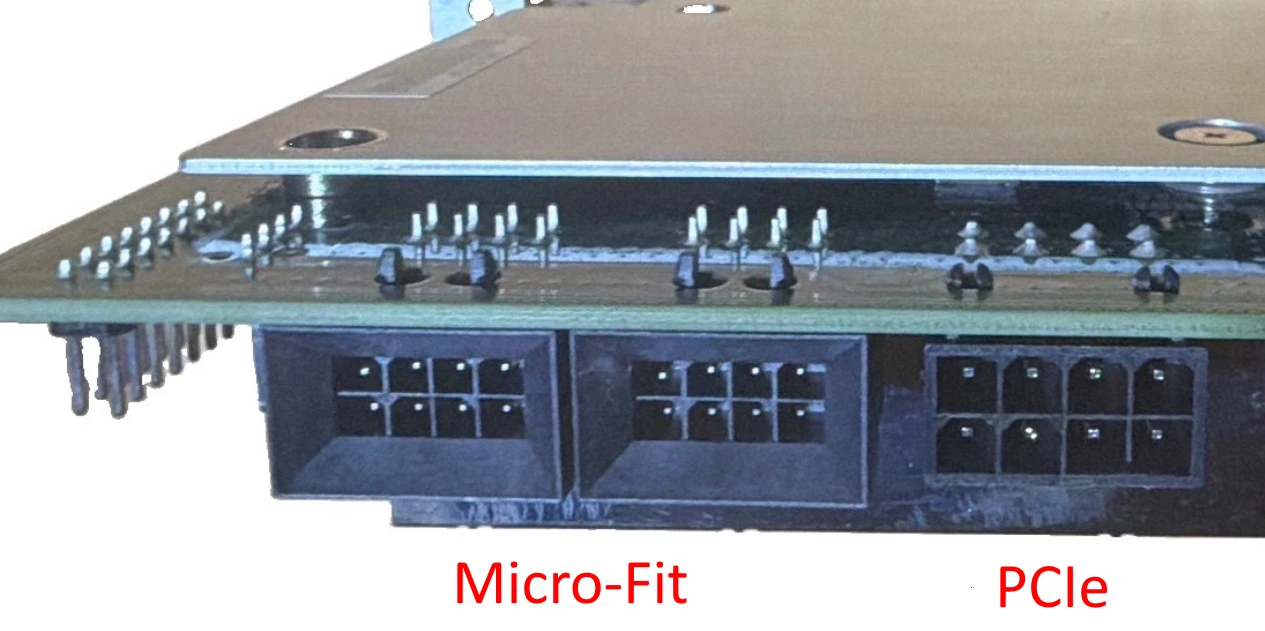
Use only copper wire with silicone insulation, 16 AWG or thicker. Some cheap PSUs use steel wire instead, which is easy to spot with a magnet. And no 6-pin to 8-pin adapters: they melt.
Cooling
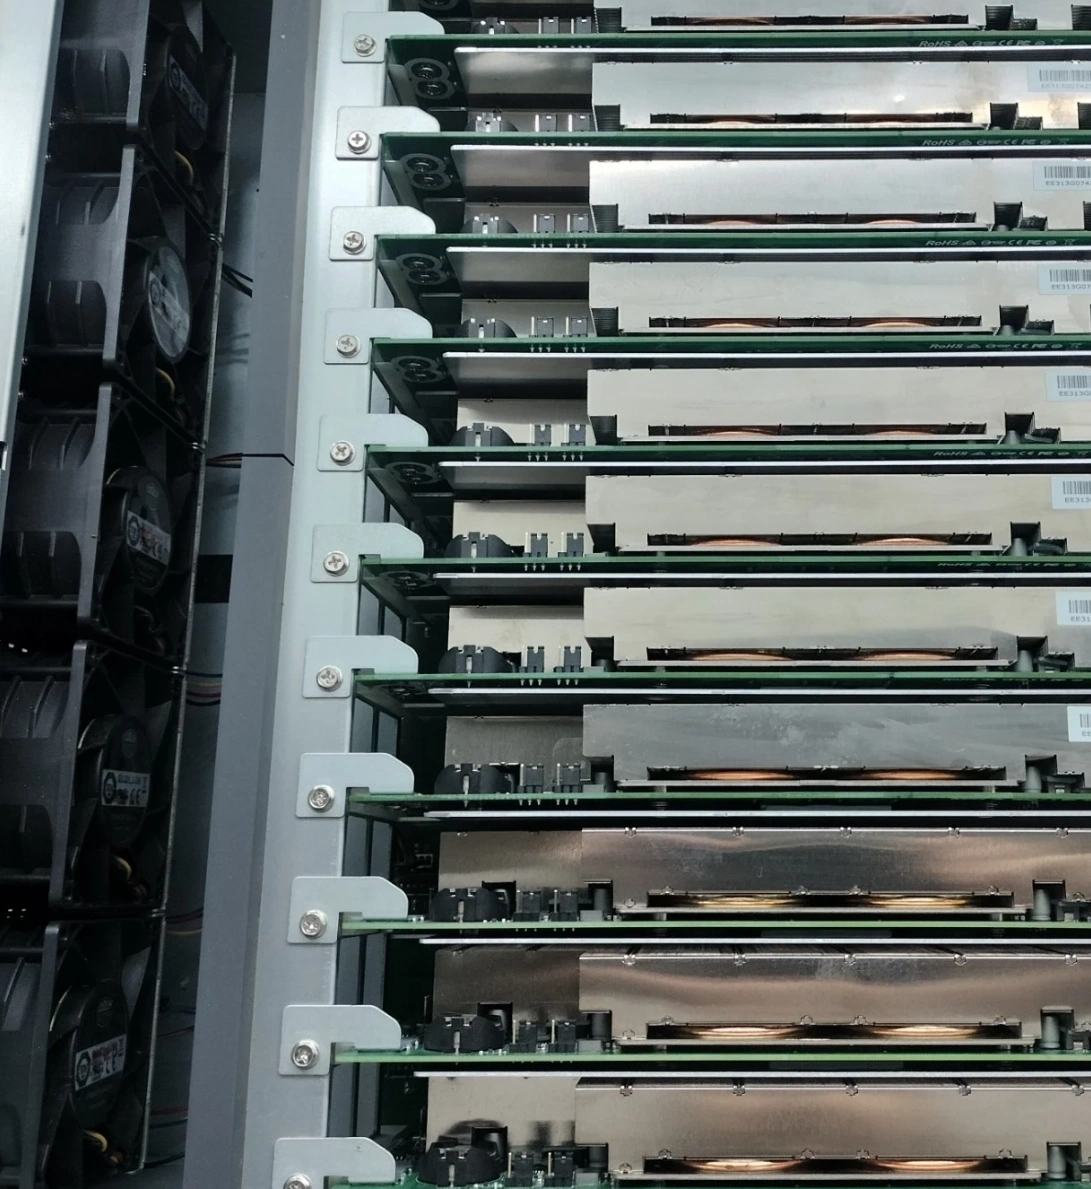
The stock heatsink was designed for a server chassis, where a wall of 80 mm fans blew air straight through it. Without that airflow it can’t keep up, so reworking the cooling is a mandatory part of the build.
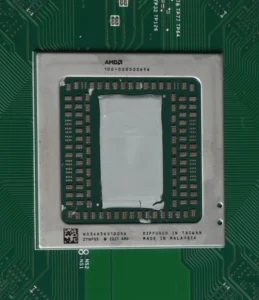
In the PS5, Sony used liquid metal on this chip, which tells you how hot it runs.
Before you buy anything, take the heatsink off and do three things:
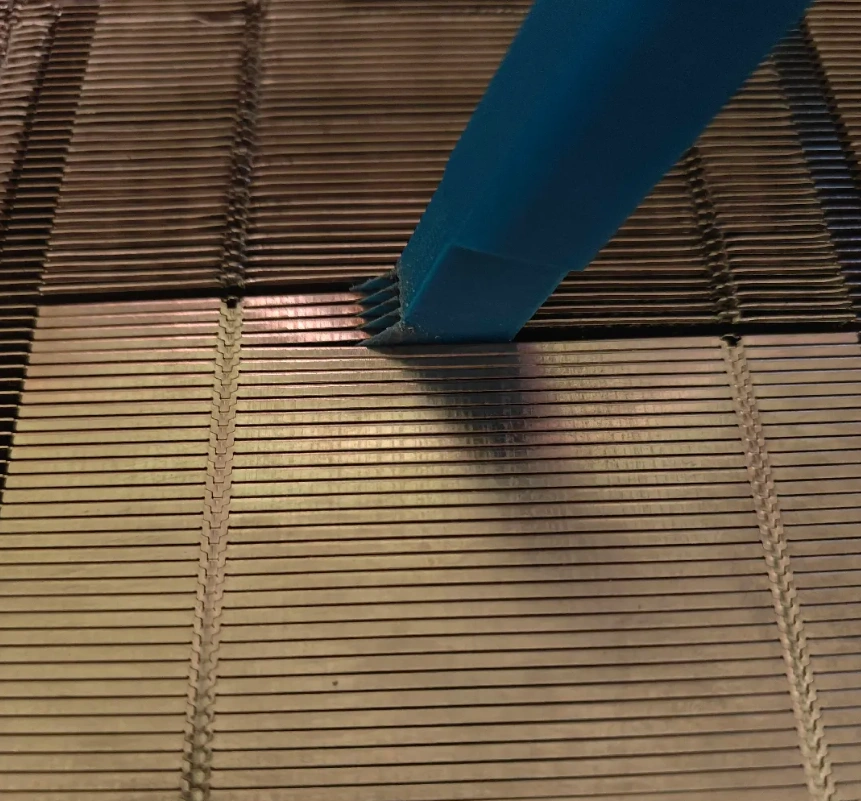
- Open up the fins in the middle section. From the factory they’re nearly pressed together, so air can’t get through. Opening them up drops temperatures by 5–10 °C. Any handy tool will do, but it rarely comes out neat the first time, which is why there’s a dedicated 3D-printable tool for the job, the “scooper“.

- Replace the thermal interface. On ex-mining boards the original paste has usually dried out long ago. The community recommends PTM7950 phase-change pads. Don’t worry if the first few runs with PTM7950 hit 80–90 °C: the pad needs several heat cycles to settle in.
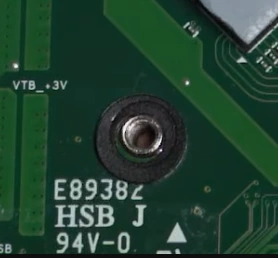
- Don’t lose the nylon washers. Under the four heatsink screws there are small clear or black washers that tend to fall out during disassembly. Without them the heatsink doesn’t press firmly against the chip, and the board hits 90–100 °C even at idle.
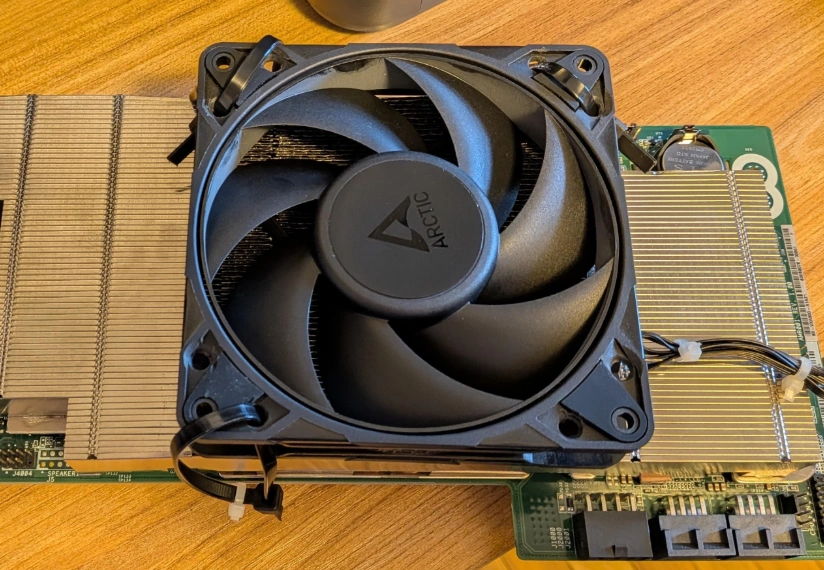
Hack: used RTX 5090 coolers, which pile up as people move their graphics cards to water cooling. According to owners, they fit the BC-250 nicely.
There are other ways to handle cooling:
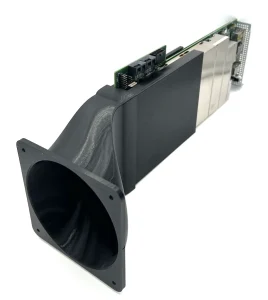
- A fan shroud. There are lots of 3D-printable designs, usually built around a 140 mm or 120 mm fan.
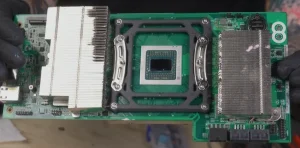
- A different cooler. People print adapters for AM4 or other desktop socket mounts and fit a tower cooler on top.
- Water cooling. Also mounted with a homemade adapter. It makes the most sense on lucky boards with all 40 compute units and 8 CPU cores unlocked and overclocking still to come. If you ditch the stock heatsink entirely, don’t forget to cool the power delivery components.
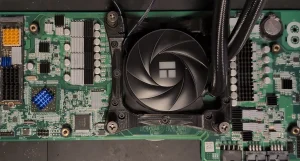
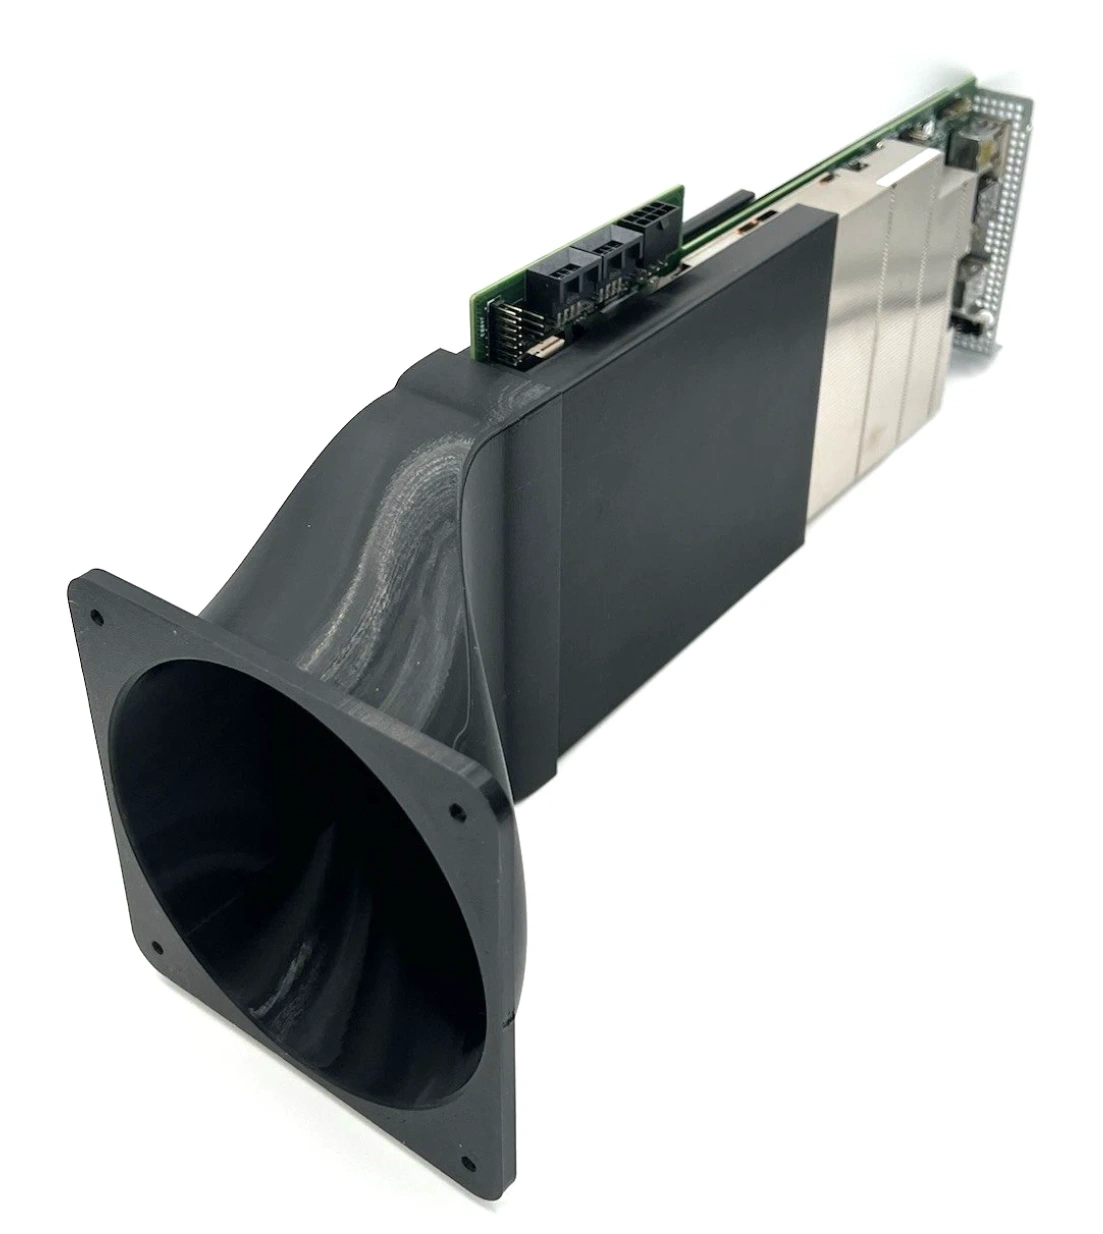
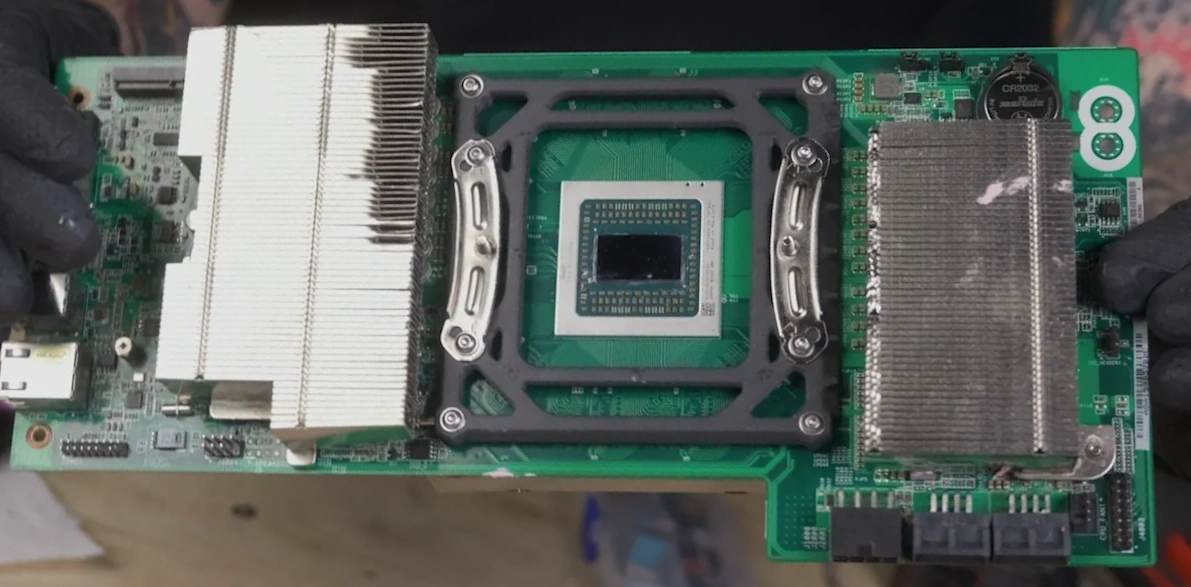
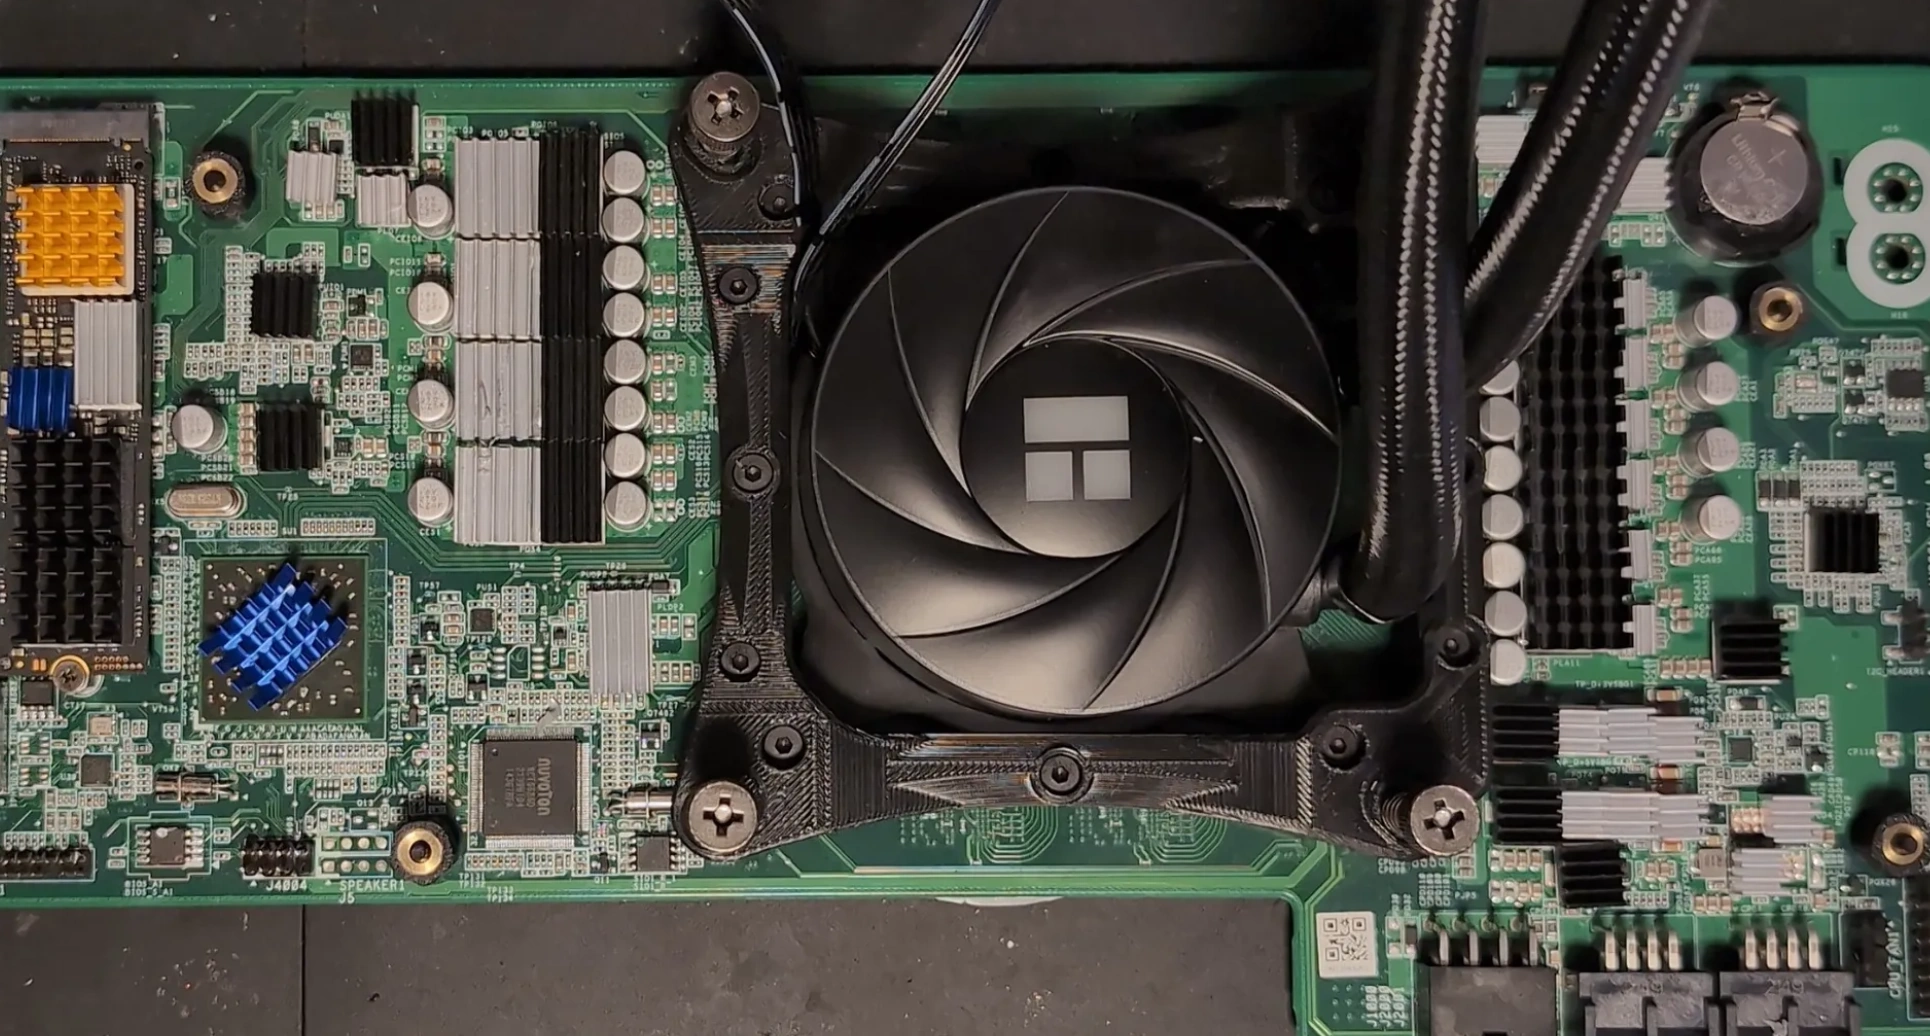
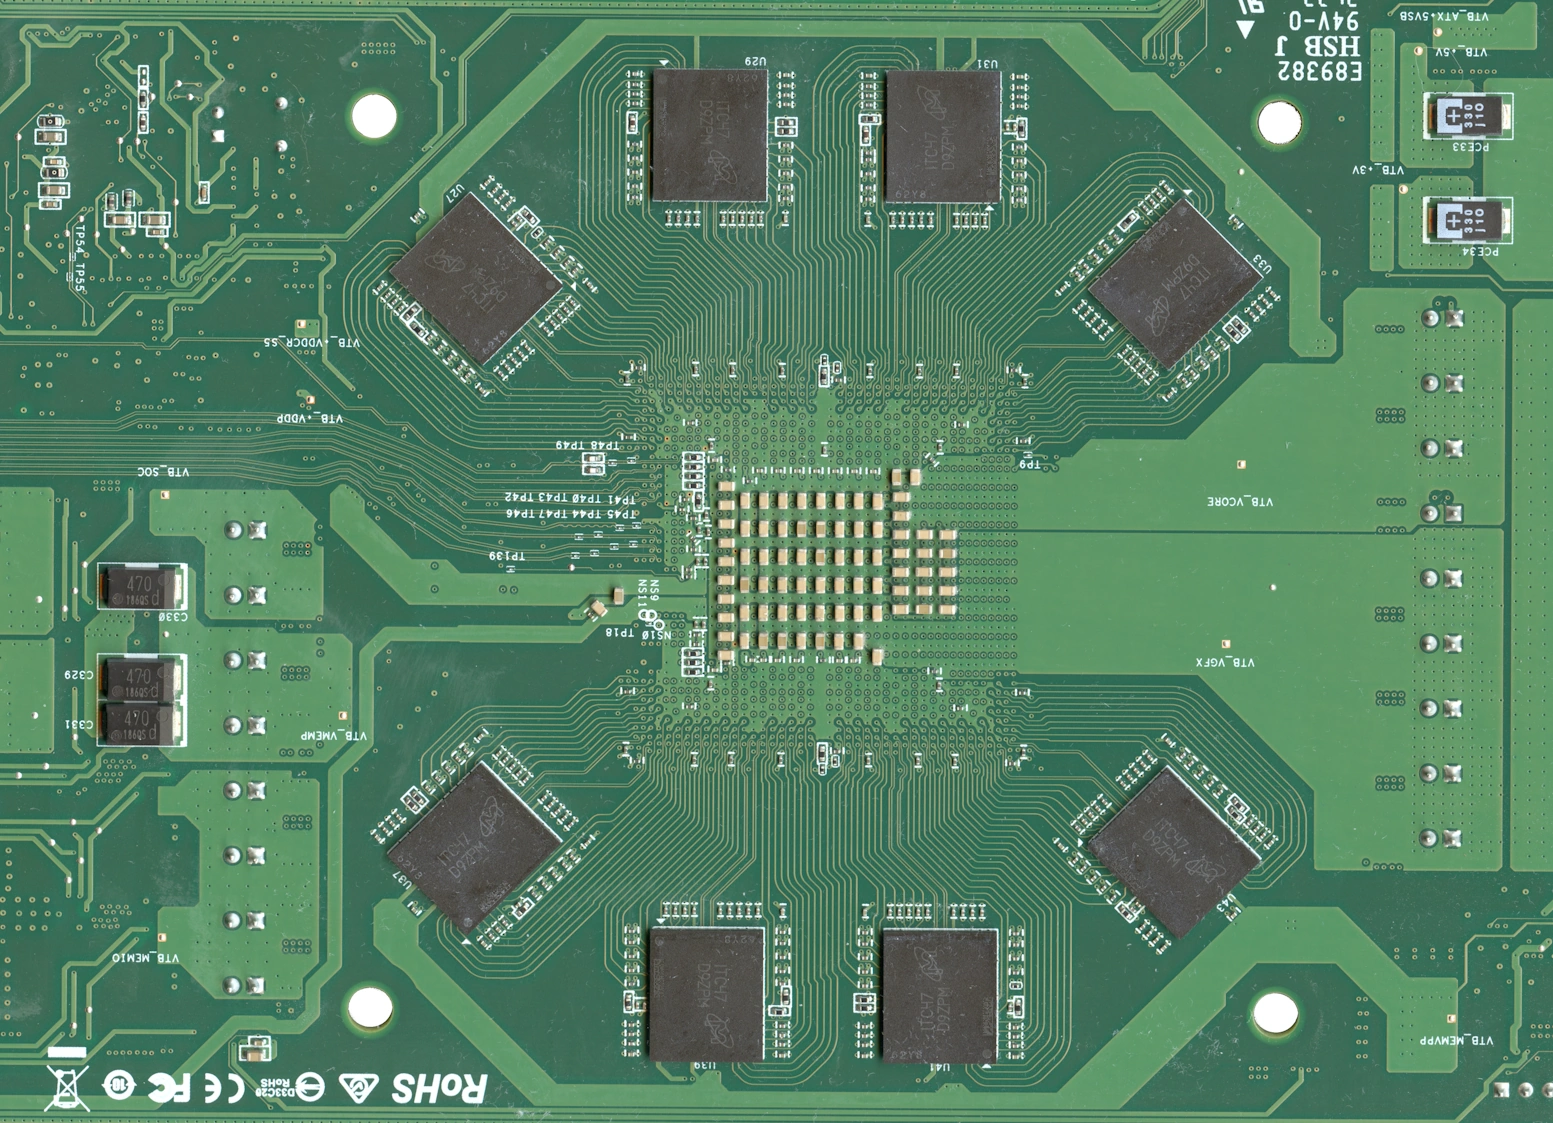
A word about the back of the board. That’s where the GDDR6 chips live, cooled by the backplate through 2 mm thermal pads. When they overheat, standard monitoring won’t show it: you’ll get artifacts or freezes half an hour to an hour into a game. To cool the memory better, put an 80–92 mm fan or a heatsink on the back. Quite recently, enthusiasts found a way to read the temperature of each memory chip through the SoC’s power management and memory controllers. It’s still experimental and only works on BIOS P3.00, but proper monitoring may be on the way.
Cases and 3D Printing
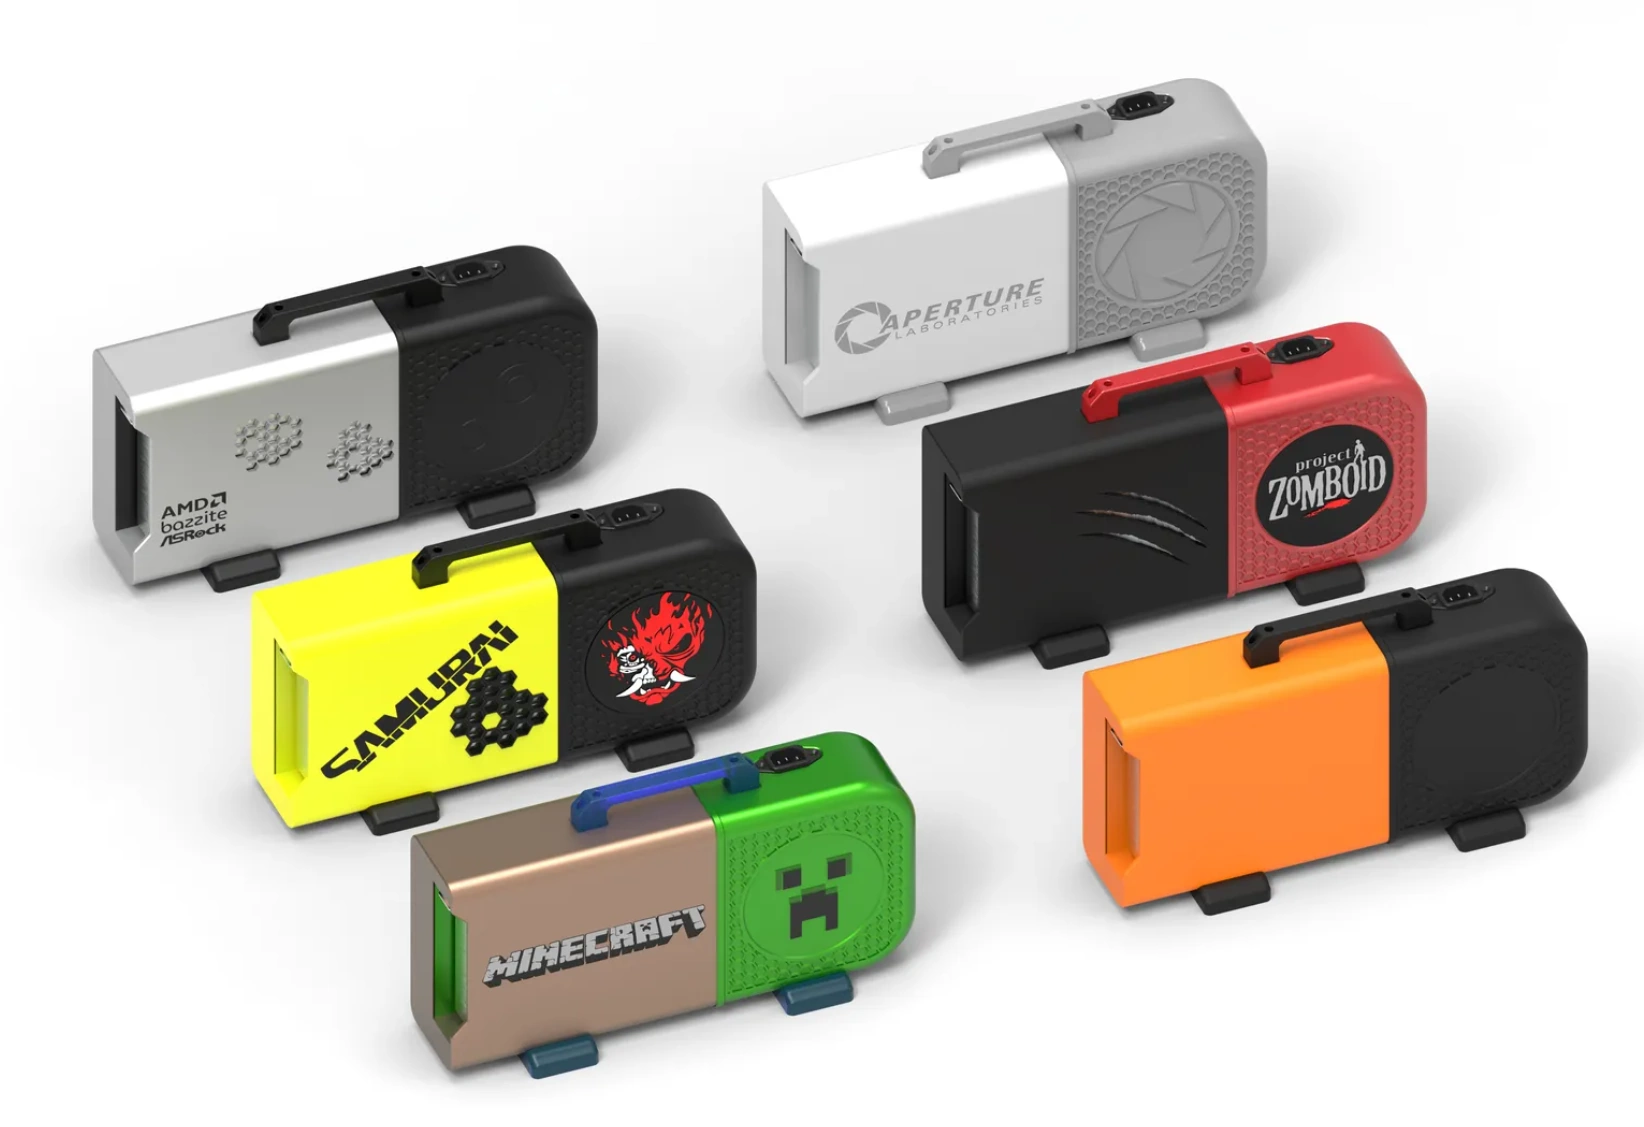
Nobody ever made an off-the-shelf case for the BC-250: it didn’t need one in the server chassis. A bare board on the desk isn’t exactly practical, so cases have become a genre of their own in the community. The documentation gallery alone lists more than 145, and nearly all of them are 3D-printed.
They roughly fall into four types:
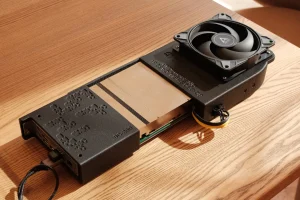
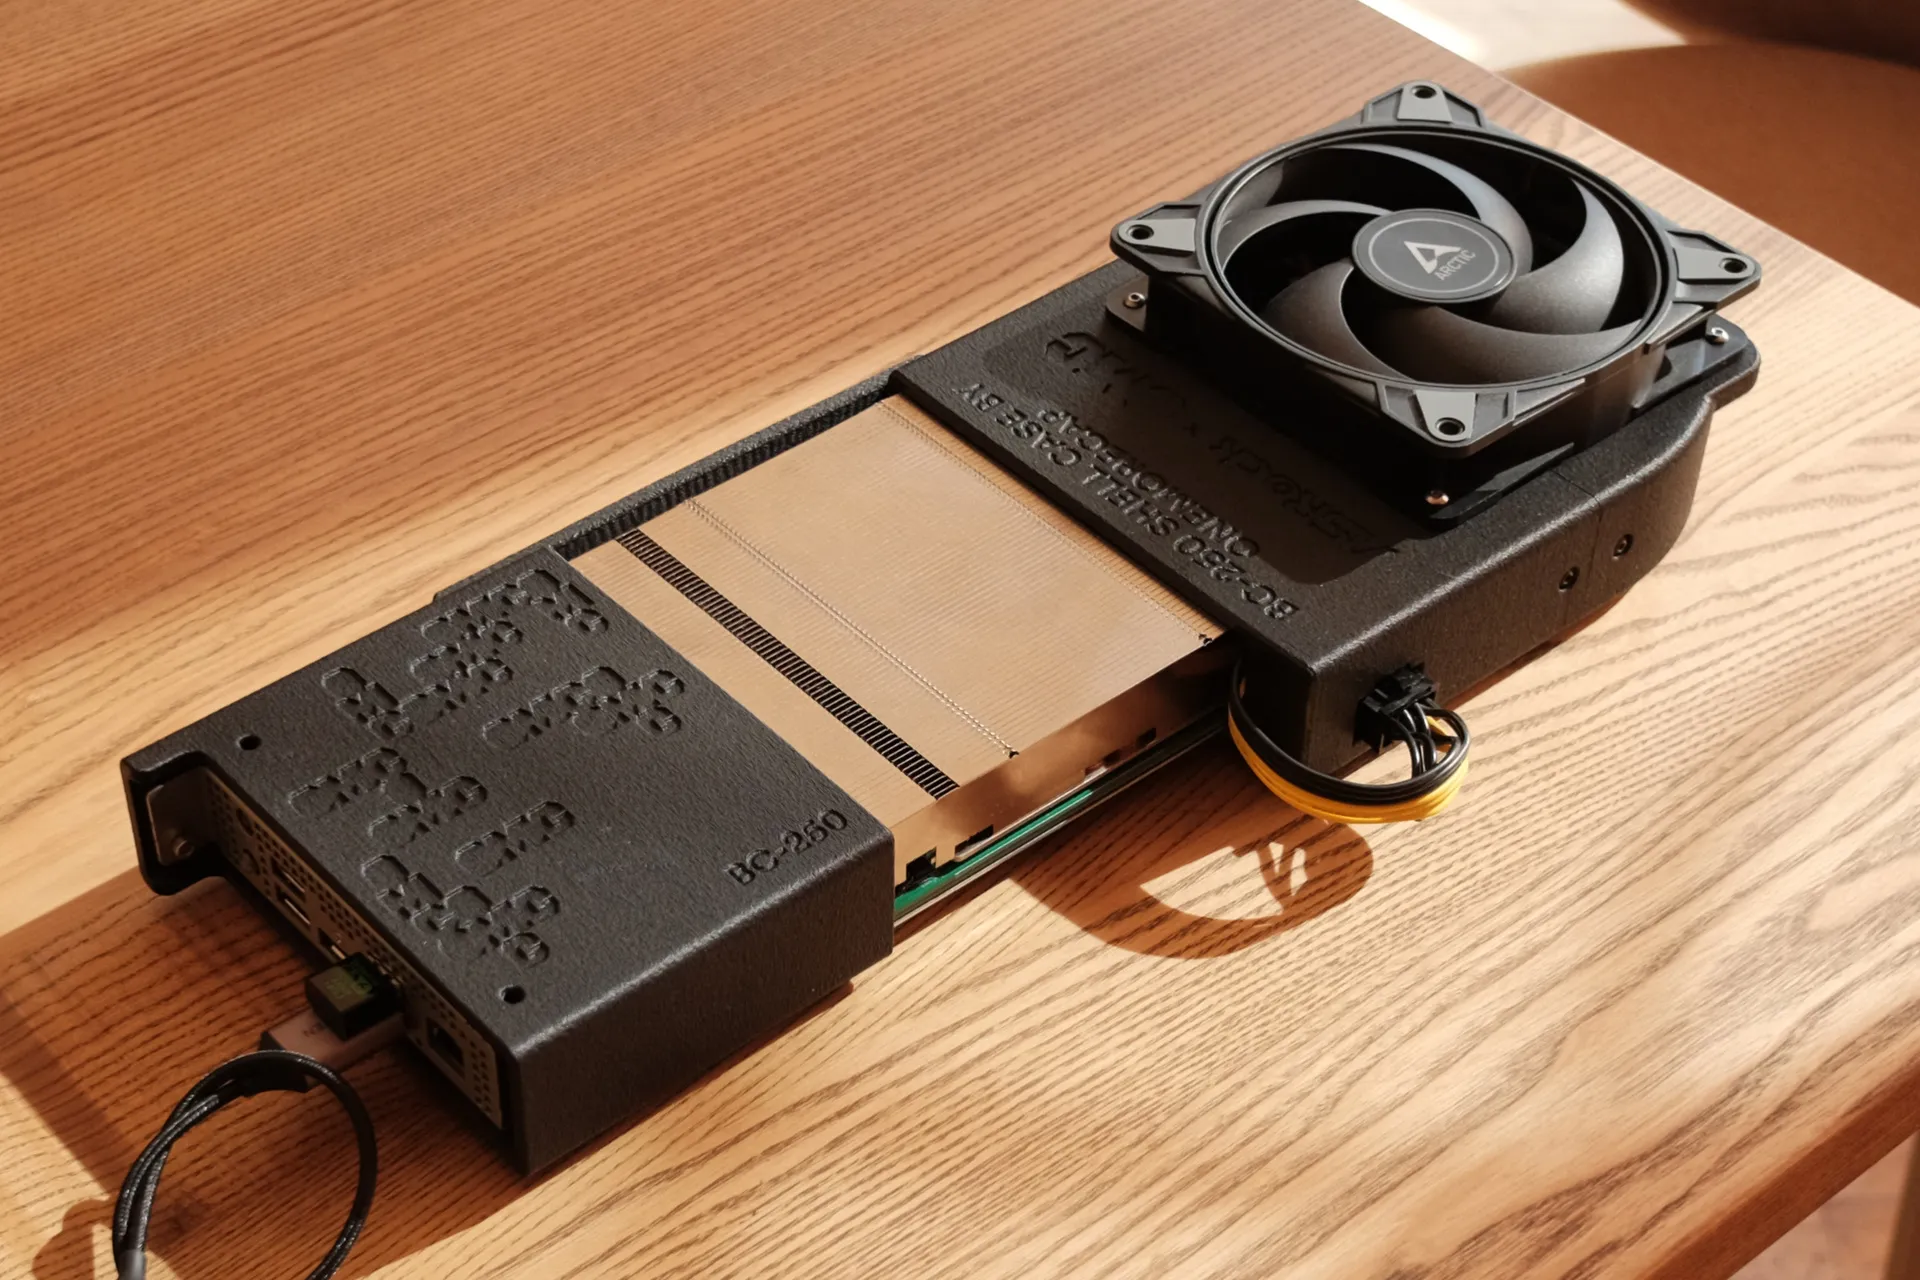
- Minimal shrouds. They fit right onto the board and hold fans over the heatsink. Some, like the Shell Case on MakerWorld, also tuck a compact Mean Well PSU inside. The quickest and cheapest way to get a system that works and looks good.
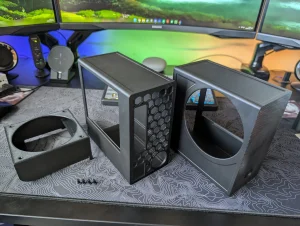
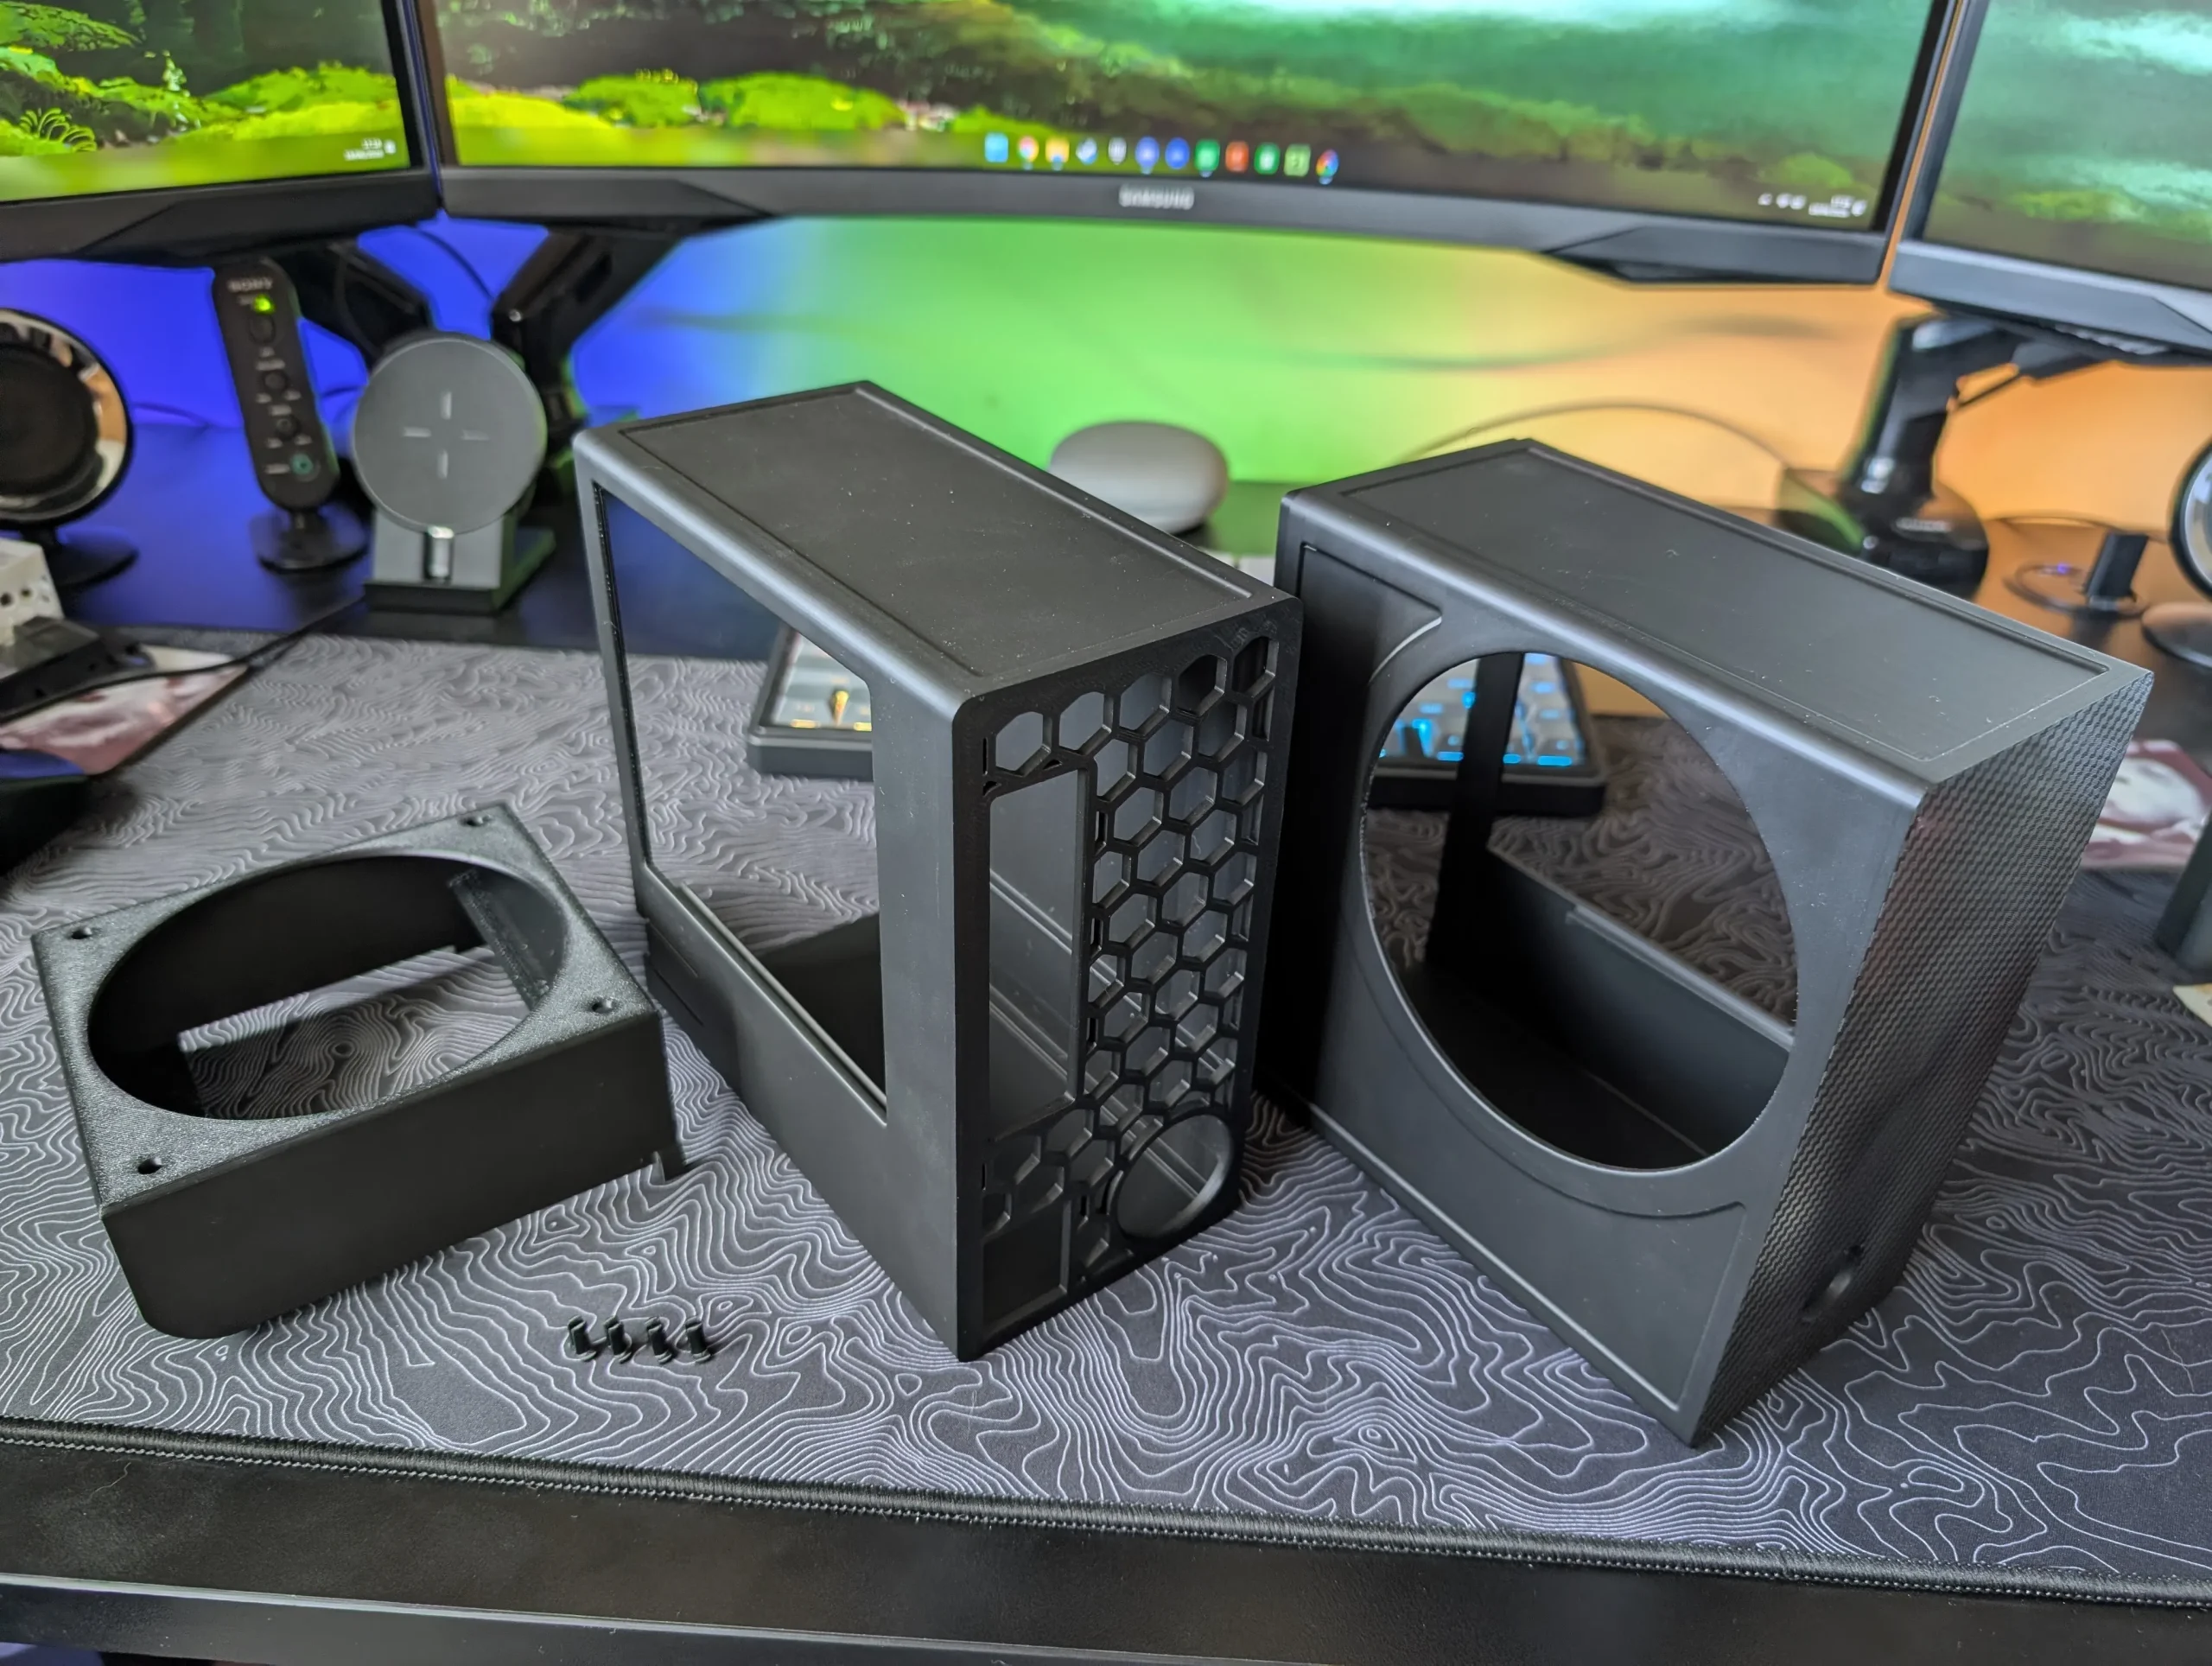
- Compact Flex-ATX cases. The most popular option for a gaming build. The MK-ULTRA Uno, for example, prints in just three parts, and the fans mount tool-free on pegs printed as part of the shroud.
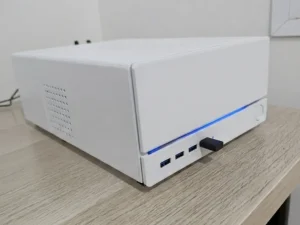
- Slim console-style cases. For anyone who wants the BC-250 sitting under the TV.
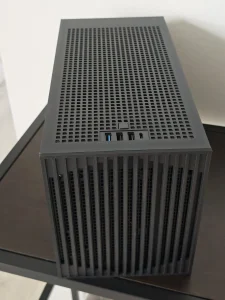
- Large cases for a standard ATX PSU. Useful if you have an old power supply lying around and don’t want to pay for a Flex-ATX unit. Be aware that they take a long time and a lot of filament to print.
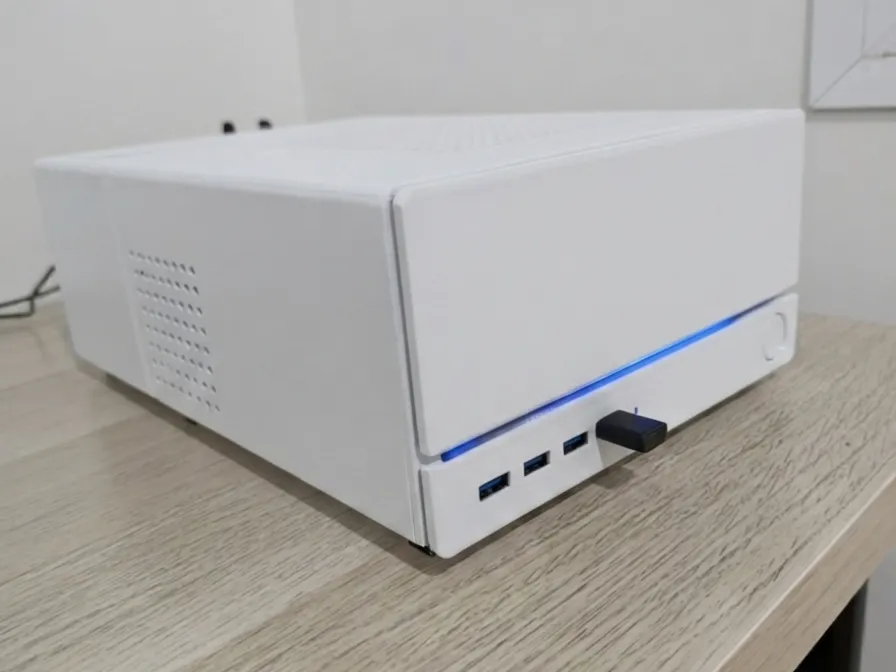
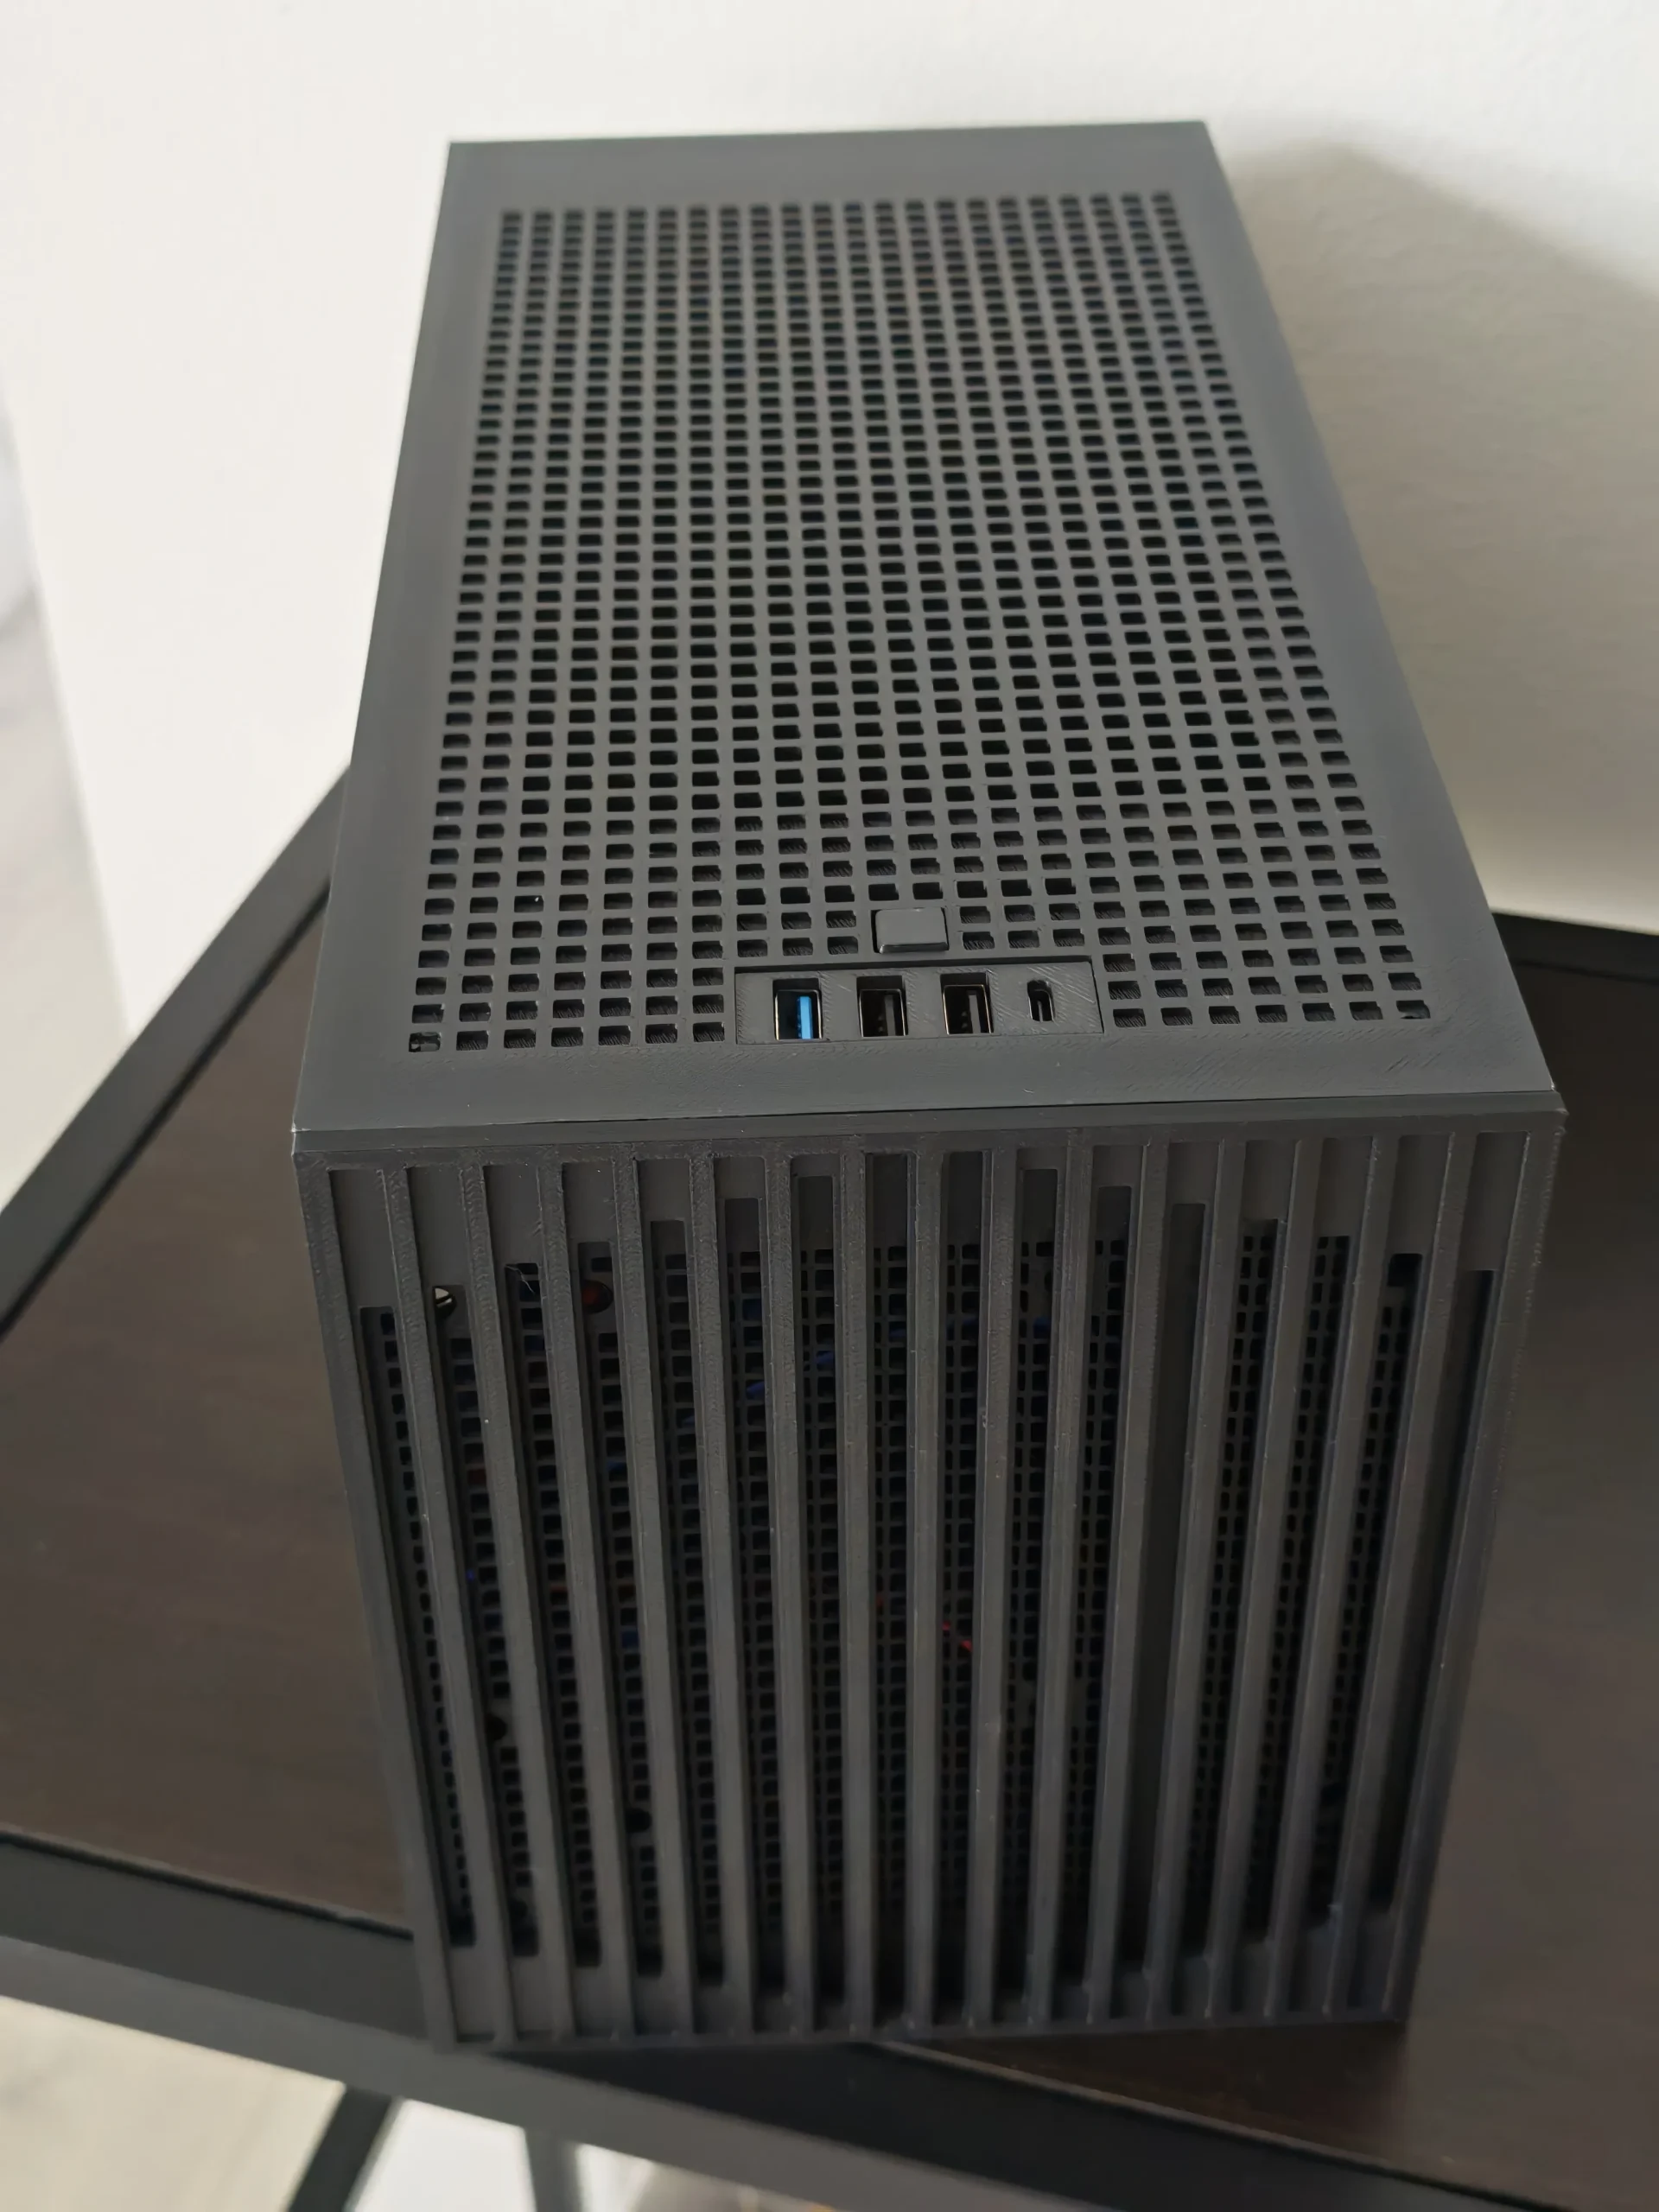
Filament. Next to a hot board, PETG or ABS is the safer bet. PLA isn’t recommended: near the power section and the back of the board it can start to deform.
Where to find models. Most of them are on Printables, MakerWorld and Thingiverse, plus the big gallery in the community docs. No printer? You can order a case from a print service or buy a finished one on Etsy or eBay, and mosfet.party sells an aluminum console-style case with a built-in PSU, along with other useful accessories.
Customization. This is where everyone gets creative: magnetic side panels, front-panel LEDs, custom colors and shapes. The board has its own LED1 and LED2 signal pins for status lights. Just don’t wire an LED to them directly; you’ll need a transistor in between. There are ESP32 projects that turn the board on with a gamepad button, like a real console. And the most inventive builders make cases out of LEGO or build portable versions with a 16-inch screen.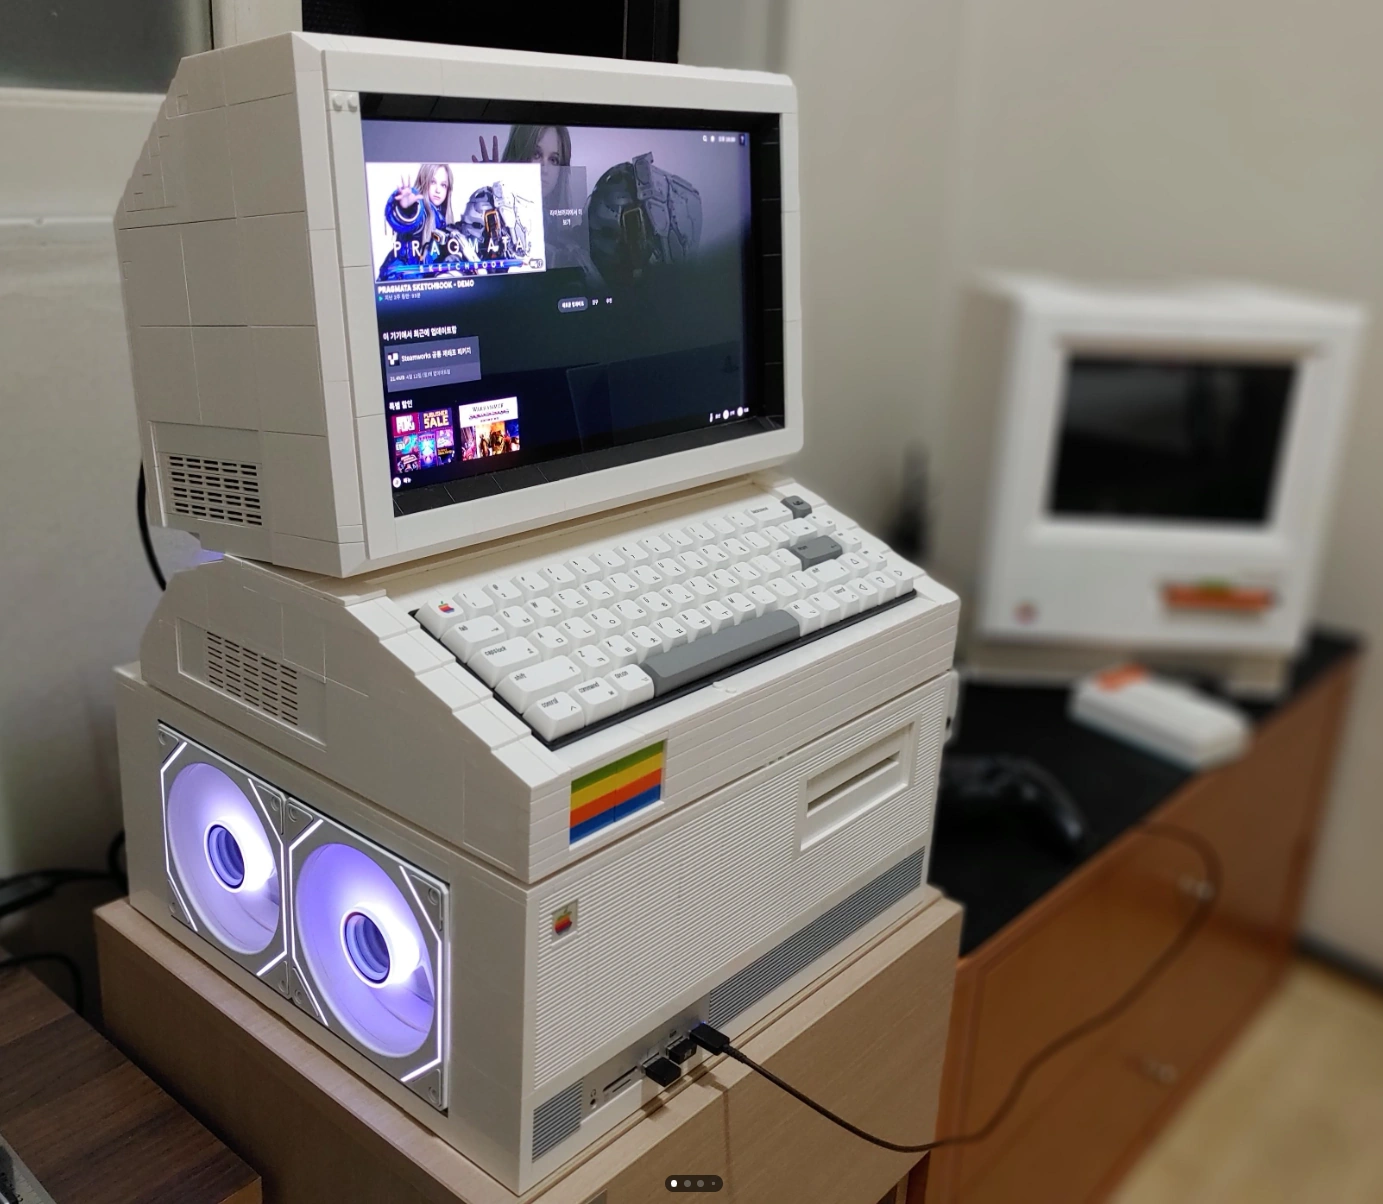
Software: BIOS and Linux
Games, and anything else that uses the GPU, only run on the BC-250 under Linux. You can install Windows, and the CPU will work there, but there’s no Windows GPU driver. That leaves Linux and the open-source RADV driver from Mesa.
Choosing a Linux Distro

Support for the board arrived in Mesa 25.1, and it won’t work on anything older. That leads to the main rule: stay away from long-term-support distros with old packages and go for a recent kernel and Mesa. Kernels come with a caveat: versions 6.15.0–6.15.6 and 6.17.8–6.17.10 are broken on the BC-250. Safe picks are 6.18 LTS or a recent 7.2.x, and for working DisplayPort audio you need 6.19.10 or newer.
The main options (though not the only ones):
- CachyOS. The community’s default pick: a recent kernel and Mesa out of the box, the best stability with an unlock and the highest performance.
- Bazzite. A Steam Deck-style interface and very little manual setup. Its stable branch used to be stuck on kernel 6.17.7, too old for the BC-250, but in September 2026 Bazzite 44 moved to kernel 7.2 and Mesa 26, so that’s no longer an issue.
- Fedora. The most thoroughly tested distro and a good first choice if you want a regular desktop.
- PikaOS. A Debian-based gaming distro.
Once Linux is installed, the board needs a few more things: kernel parameters that let the GPU use almost all of the shared memory, a GPU frequency governor (without it the graphics stay stuck at 1500 MHz and the board burns up to 100 W at idle), an ACPI fix for CPU power saving, and a fan control driver. You don’t have to set all of this up by hand: the auto-setup scripts for CachyOS and Bazzite take care of it, and if something goes wrong, the community docs have current instructions for each distro.
Flashing the BIOS
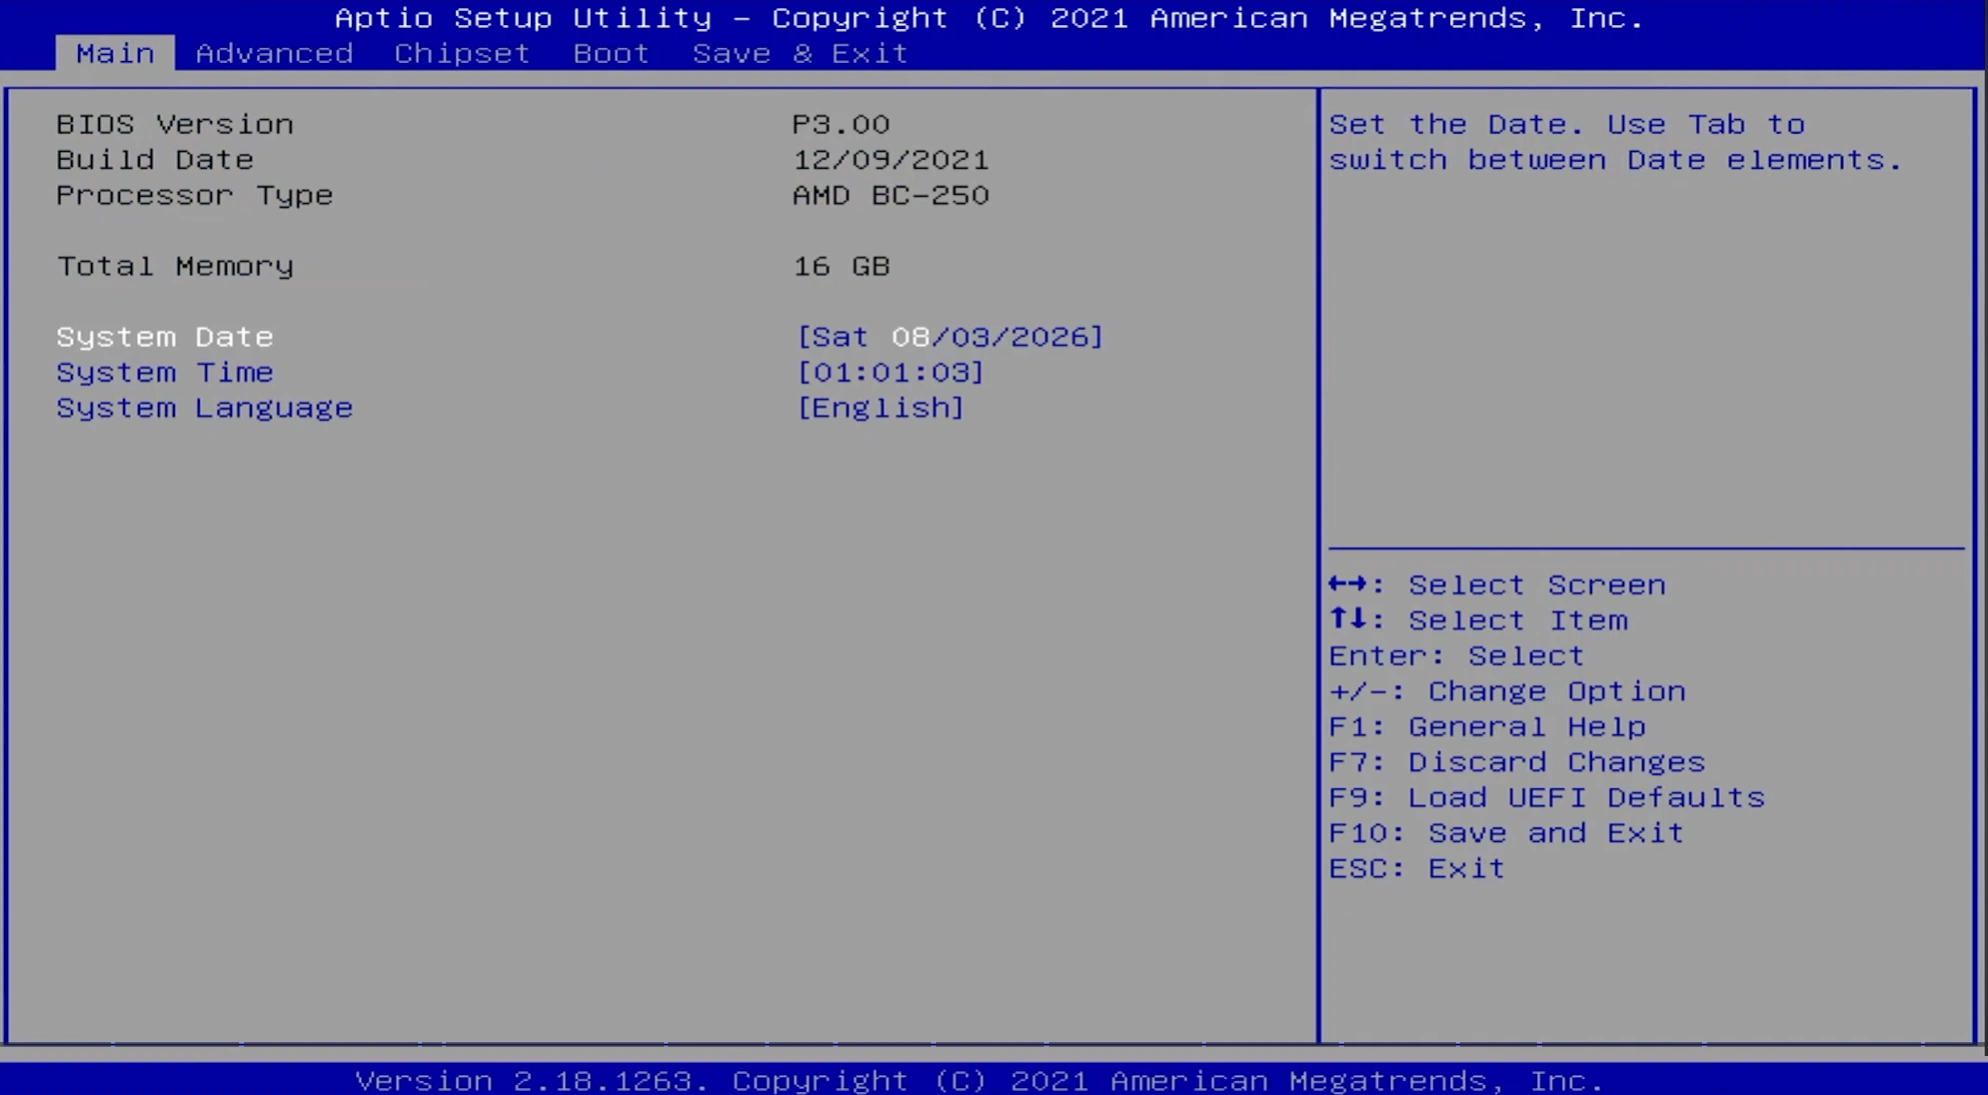
The stock firmware (P2.00, P3.00 or P5.00) uses a fixed memory split between the CPU and GPU and hides most of the settings. Modded firmware exposes the chipset menu and lets VRAM be allocated dynamically.
| Firmware | What you get | Who it’s for | Where to get it |
|---|---|---|---|
| Stock P2.00, P3.00, P5.00 | They work, but the VRAM split is fixed. P3.00 already has fan control and an IOMMU toggle | If you only need to change the VRAM size: on P3.00 and P5.00 you can do that from Linux with the bc250_memcfg utility | TheRetroWeb |
| Stock P4.00 | Unstable: 3D applications crash on it | Reflash it, no exceptions | — |
| P3.00 CHIPSETMENU (Segfault’s mod) | Dynamic VRAM, chipset menu exposed | Recommended for most people | bc250-bios |
| P3.00 + MeiMeiDXE | Everything CHIPSETMENU has, plus 8 cores and the ACPI fix built into the firmware | Only once the cores have passed the script’s test | BC-250 UEFI v2.2 Firmware Menu Script |
| P5.00_clv | Every option exposed, ReBAR and debug settings included | Experienced users: one careless setting can easily brick the board | TheRetroWeb |
How to flash from a USB drive:
- Format a USB drive of 32 GB or smaller as FAT32 and copy the contents of the
BIOS EFIfolder from the4U12G BIOS Update.ziparchive (in the kenavru/BC-250 repository) to its root. - The
Robin5.00file in there is the stock P5.00. Replace it with your firmware, renamed toRobin5.00(capital R, no extension). - Pull the SSD out of the board and connect the monitor directly over DisplayPort, since the BIOS screen sometimes doesn’t show up through adapters. Plug in the USB drive and power the board on. With no SSD it should drop into the EFI shell by itself; if it doesn’t, pick the USB drive in the BIOS (Delete key).
- At the
Shell>prompt, typeblk0:and press Enter, then typels. You should see the files from the USB drive. If you don’t, tryfs0:,fs1:and so on instead ofblk0:until you find it. - Back up the current BIOS straight to the USB drive with
AfuEfix64.efi backup.rom /O, then start flashing withFlash.nsh. - Don’t touch anything until it’s done, even if the screen looks frozen: give it at least 15 minutes. Losing power at this point will brick the board, so a UPS is a good idea.
- Once the board reboots, shut it down, remove the USB drive and put the SSD back in.
For MeiMeiDXE there’s a separate menu-driven script by Forbidden-Darkness: you choose a boot logo in it, and BIOS backup and restore have their own menu items.
You can also flash right from Linux with flashrom, but doing it safely means comparing images and writing individual regions step by step. Making a backup with
sudo flashrom -p internal -r backup.rom, on the other hand, is risk-free: reading can’t break anything.
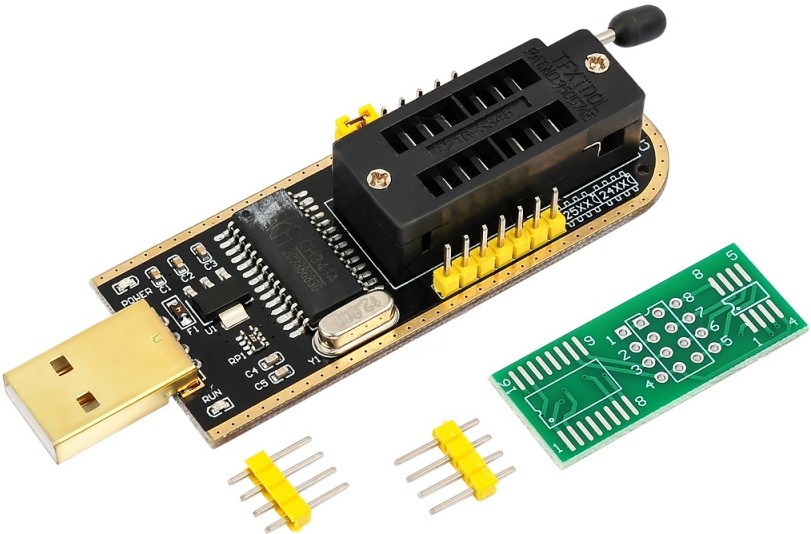
If something goes wrong, a programmer can bring the board back: either through the J4004 header or with a clip on the 16 MB BIOS_A1 chip (Winbond W25Q128 or Macronix MX25L128) next to the M.2 slot. If the software detects a 512 KB chip, that’s the SuperIO controller’s memory, and you must leave it alone. Using a cheap CH341A? Check its voltage first: many of them put 5 V on the data lines even in 3.3 V mode, and our CH341A voltage fix guide explains how to deal with it.
After any flash, clear the CMOS: pull the CR2032 battery for a minute or use the CLRCMOS1 jumper. And don’t run Smokeless_UMAF on the BC-250, even though it’s often recommended for other AMD APUs: it can damage the board for good.
BIOS Settings
After flashing and clearing the CMOS, enter the BIOS (Delete key at power-on) and set the following:
Chipset → GFX Configuration:
  Integrated Graphics Controller = [Forces]
  UMA Mode                       = [UMA_SPECIFIED]
  UMA Frame Buffer Size          = [512M]

Advanced → CPU Configuration:
  IOMMU = [Disabled]

Boot → Boot Mode:
  Boot Mode = [UEFI]
What each one does:
- Integrated Graphics Controller = Forces turns the integrated graphics on unconditionally. Without it, the VRAM settings below won’t appear.
- UMA Mode = UMA_SPECIFIED lets you set the VRAM size manually.
- UMA Frame Buffer Size = 512M reserves a fixed 512 MB for graphics, and Linux hands it the rest dynamically as needed. That’s the best option for most uses. Some heavy games run better with a fixed 4 or 6 GB; the gaming section covers that.
- IOMMU = Disabled is a must: IOMMU is broken on the BC-250 and causes black screens and freezes.
- Boot Mode = UEFI is what every modern distro expects at install time.
Unlocking: 8 Cores and 40 CUs
The two CPU cores and 16 compute units on the BC-250’s die are disabled in software, not physically, so they can be turned back on. Just remember where these chips came from: they failed binning for the PS5, and some of the disabled hardware may well be genuinely defective.
CPU: 6 → 8 Cores
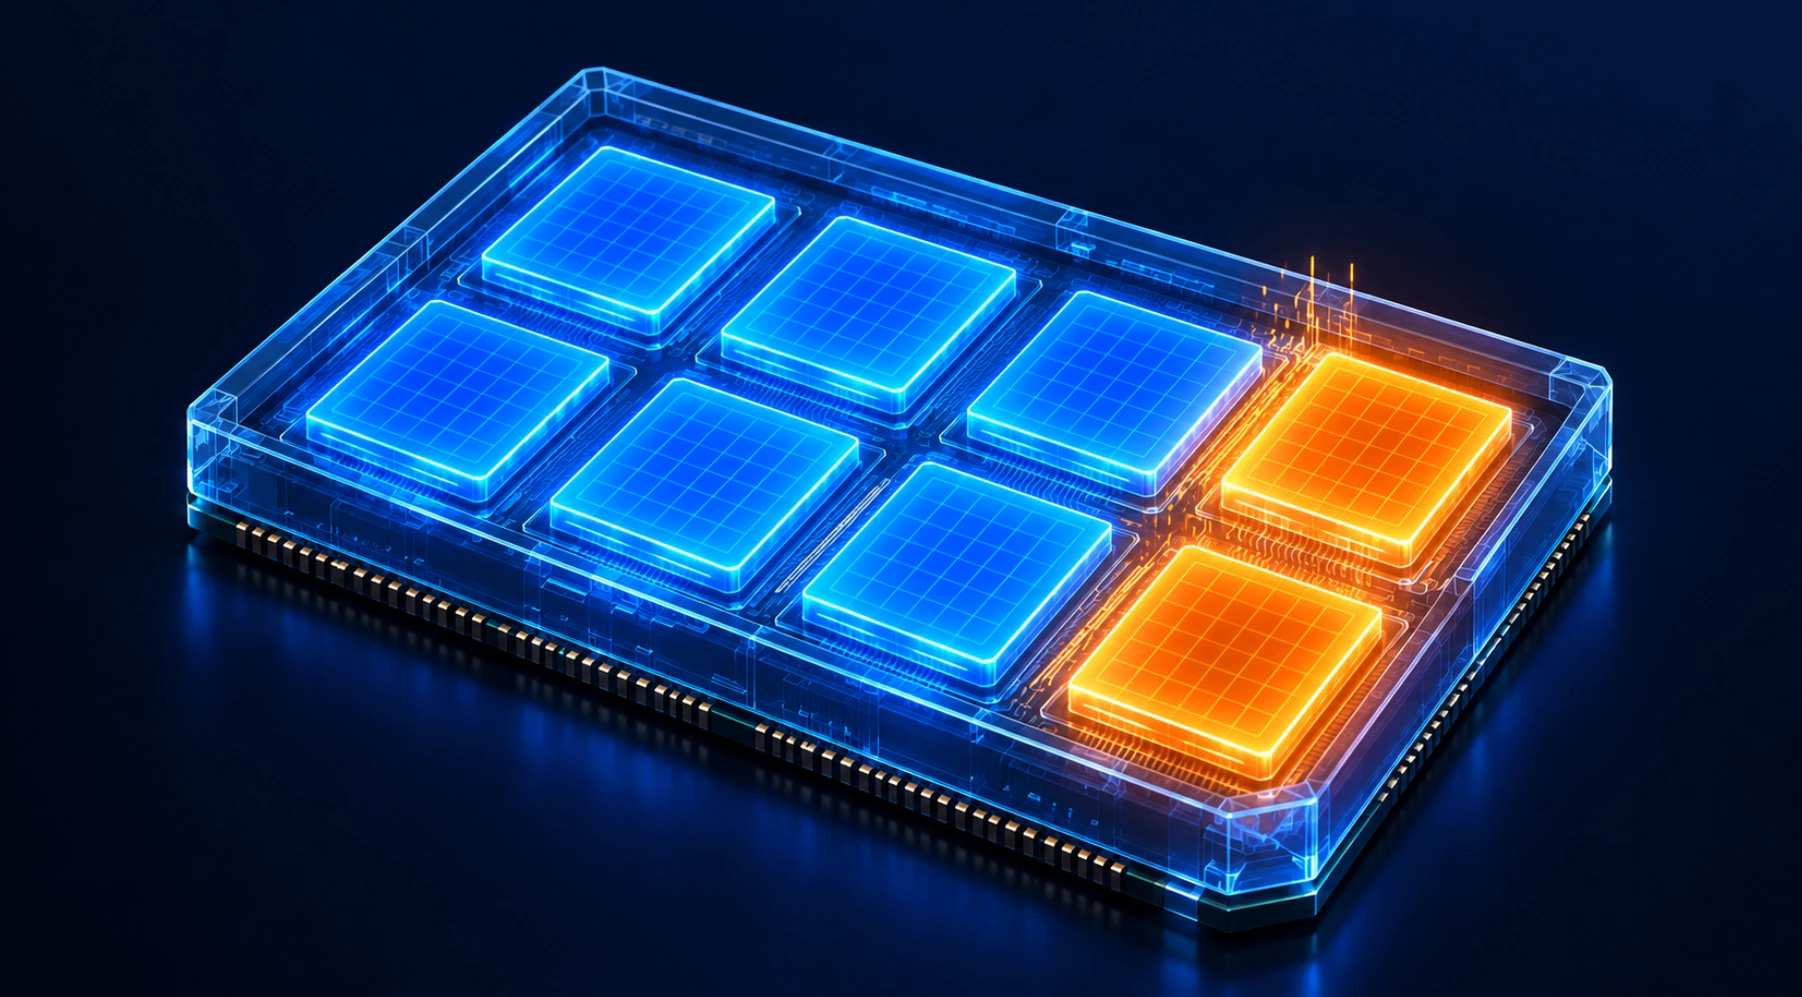
There are three ways to do it: a script run from Linux, an EFI loader that enables the cores on every boot, and a modded BIOS with a toggle in its settings. The script is the safest. It writes a new core mask to the SoC’s power management controller without touching the firmware, and after a full power-off the board goes back to six cores. That’s why the script is set up as a service that re-enables the cores on every boot.
The number one rule: test the cores with the script and its bundled test first, and only then flash a BIOS with the unlock. If a core turns out to be bad, a board with that BIOS simply won’t start, and only a programmer can bring it back. Based on a small sample of community reports, about one board in five has bad cores. If only one core is faulty, you can run seven out of eight.
What 8 cores get you: around 27% more in 7-Zip and 5–14% more FPS in Cyberpunk 2077. The price is higher power draw and more heat.
Side effects: after the unlock, monitoring starts reporting the wrong GPU clock (fixed with a governor option or a patch), and the new threads need updated ACPI tables, otherwise they won’t drop into idle states.
GPU: 24 → 40 CUs
This used to mean patching the kernel driver, but now there’s bc250-cu-live-manager. It turns compute units on and off on the fly, with no kernel patches and no reboots, and the setting survives system updates.
In AI workloads, 40 CUs are 1.25–1.55x faster at the same 1500 MHz, with prompt processing gaining more than text generation. The cost is roughly 30 W more and higher temperatures. In games the gain goes up to 28%, and in Black Myth: Wukong an unlocked board even beat the RX 6700, 61 FPS to 59.
The Silicon Lottery
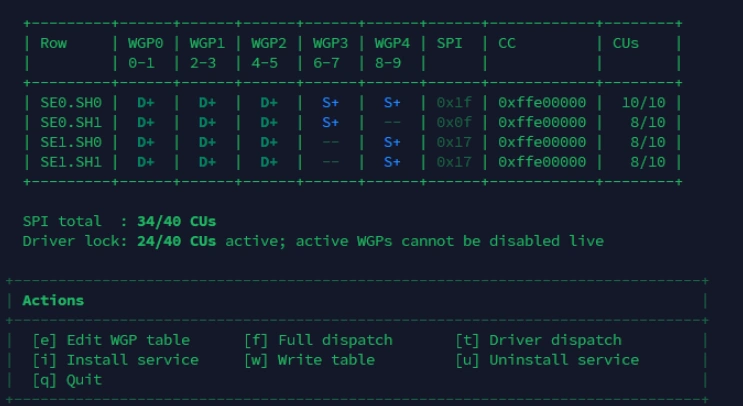
This part often gets left out: 40 working CUs is the best case, not the norm. Plenty of boards are only stable with 36–38, and some owners do even worse. At most half of owners win both lotteries, cores and CUs. The good news is that even a partial unlock is a win: 36–38 CUs matches or beats what the PS5 has.
Testing goes cluster by cluster. CUs are enabled in pairs, and every pair has to be run through stress tests and games. With bc250-cu-live-manager you don’t need to reboot between tests. Pairs that fail get switched off, which costs you two CUs at a time. Stability also depends on clock speed: sometimes all 40 CUs hold at 1500 MHz, but only 38 at 1700 MHz and up.
If you ever unlocked a Phenom II, this will sound familiar: for one person the extra core turned out to be dead, for another it just needed a little more voltage.
What It Costs You
- Heat and power. Unlocked, the board draws noticeably more, so the cooling, PSU and cables all need headroom.
- You’ll have to redo your overclock and undervolt. The CPU and GPU share one power and thermal budget, and settings dialed in for stock may become unstable after the unlock.
- Time. Testing every cluster and finding stable clocks takes more than one evening.
On the plus side, the software unlock is fully reversible: if something goes wrong, you just turn it off and the board is back to its stock configuration.
Gaming: What the BC-250 Can Do
Games run through Steam and Proton, just like on the Steam Deck, and most of the library works without any fuss. Performance, though, depends a lot on how your particular board is set up.
Enthusiasts have even got FSR 4 running on the BC-250, although the chip lacks proper support for the INT8 instructions it needs. A workaround in the RADV driver made it possible. The trade-off: it looks better than FSR 2/3 and XeSS, but frame rates can be lower than with them.
Tip: turn off shader pre-caching in Steam’s settings. Steam downloads a shared shader cache that doesn’t suit the BC-250 and re-downloads it every time you launch a game, wiping out the cache the board has already built for itself.
What FPS to Expect
YouTuber ETA Prime tested the same board stock and with all 40 CUs unlocked. Same conditions for both: 1080p with no upscaling, high settings, GPU at 2 GHz.

| Game | 24 CUs (stock) | 40 CUs | Gain |
|---|---|---|---|
| GTA 5 | 58 FPS | 72 FPS | +24% |
| Hitman 3 | 58 FPS | 69 FPS | +19% |
| Spider-Man 2 | 36 FPS | 46 FPS | +28% |
Even at stock, the BC-250 handles most modern games at 1080p without trouble, and the unlock adds up to 28% on top. Keep in mind these numbers were taken on 6 cores, with the 40 CUs running at 2 GHz.
And here’s the board pushed close to its limit (8 cores, 40 CUs plus an overclock), up against the Steam Machine:


The Real Bottleneck Is the CPU
The console Zen 2 at 3.5 GHz is the board’s weakest link, and in most games it’s what will hold you back, even after unlocking the extra cores and overclocking.
A few tweaks help a bit. According to the community, the mitigations=off kernel parameter adds 10–15% FPS in CPU-bound games, at the cost of turning off protection against CPU vulnerabilities.
Async compute is a story of its own. When BC-250 support was added in Mesa 25.1, the separate compute queue had to be disabled because it was buggy, so games pushed all their work through the main graphics queue. In August 2026, an enthusiast going by DryhoppedIPA released kernel and Mesa patches (bc250-gfx1013-fix) that bring async compute back, and Cyberpunk 2077 gained about 25% FPS with them. The patches are already included in some of the auto-setup scripts and in a dedicated CachyOS kernel build for the BC-250.
Memory
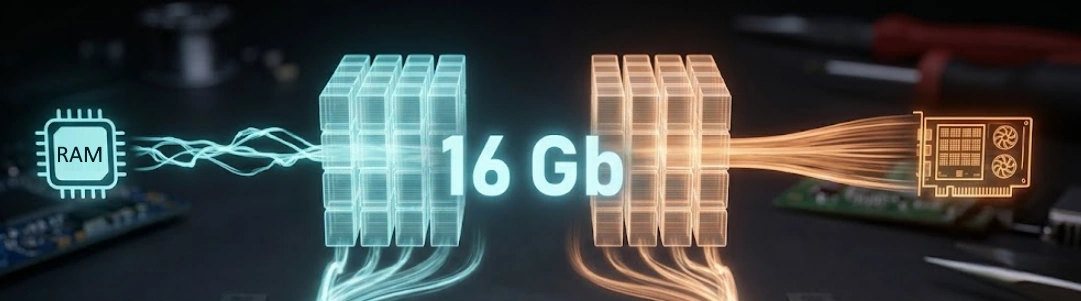
In 512 MB mode, Linux gives the GPU as much memory as the game asks for. That works for most games, but there are some catches.
- Not every game gets along with dynamic allocation. Spider-Man 2 crashes after 5–10 minutes, Clair Obscur: Expedition 33 crashes as well, and Doom Eternal stutters noticeably. Setting a fixed VRAM size in the BIOS solves this: most games are fine with 4 GB, while heavy AAA titles, these included, need 6 GB. That still leaves 10–12 GB for the system.
- System RAM can run short too. Hogwarts Legacy, for instance, wants around 16.5 GB, which is more than the board has in total. Compressed swap helps here: either zram in RAM, or zswap with a 16–32 GB swap file on the SSD.
- 4K eats memory fastest. If you want to play at that resolution, turn on an upscaler first and only then bump the resolution up. Otherwise the game may crash and refuse to launch until you fix its config file by hand.
- Frame generation needs memory as well. In-game frame generation keeps the extra frames in VRAM. Lossless Scaling on Linux (LSFG-VK) is noticeably lighter on memory, but it requires a purchased copy of Lossless Scaling on Steam.
Emulators
Emulation of older consoles is in good shape on the BC-250: PCSX2 for the PS2 runs great, Dolphin handles GameCube and Wii without issues, and RPCS3 copes with lighter PS3 games. Switch is a different story, with Zelda: Tears of the Kingdom running at around 20 FPS. And the Xenia Xbox 360 emulator hangs the system outright. That may change down the road.
What Won’t Run and What Will Act Up
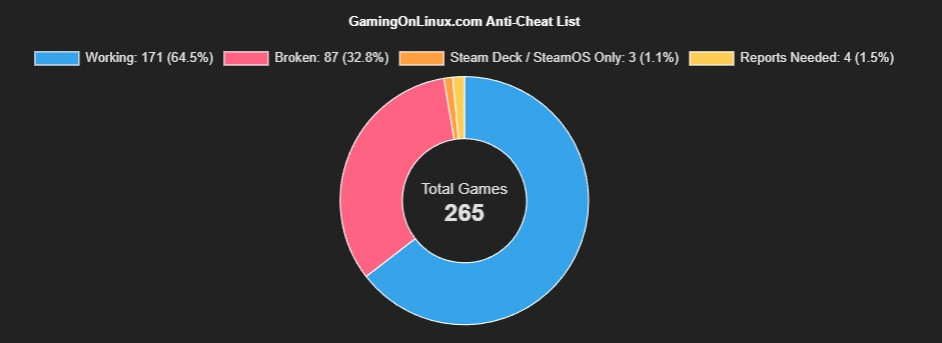
Many online games won’t launch because their anti-cheat doesn’t support Linux. The best-known ones include Fortnite, Apex Legends, PUBG, Rainbow Six Siege, Valorant, League of Legends, Call of Duty, Battlefield 6, GTA Online, Destiny 2 and Roblox. That’s a Linux limitation, not the board’s, but for a lot of people it’s a dealbreaker.
There’s no way to give a complete list here: statuses change all the time, and the Are We Anti-Cheat Yet database tracks more than a thousand games, over half of them marked as broken. You can look up a specific game on areweanticheatyet.com or in the GamingOnLinux list. Many games with Easy Anti-Cheat and BattlEye do work, as long as the developer has turned on Linux support: Elden Ring, Dead by Daylight and Halo: The Master Chief Collection, for example. Counter-Strike 2 works too.
That doesn’t mean everything else runs perfectly. In Resident Evil Requiem, enabling strand-based hair turns the picture into a mess of artifacts, and in Doom: The Dark Ages you have to restart the game after changing the resolution. That’s not the fault of the board or the unlock: nobody designed the BC-250 for gaming, and its drivers were written by the community. Every now and then you’ll have to tinker to get a game running right.
Beyond Gaming: Why Tinkerers Love the BC-250
Gaming is the obvious use case, but far from the only one. For many people the BC-250 is above all a cheap piece of hardware to experiment with.
Local AI. Arguably the strongest use case after gaming. 16 GB of fast memory the GPU can use is rare at this price, and it holds models that won’t fit on a typical 8 GB graphics card. Everything runs through Vulkan, the go-to tool is llama.cpp, and there’s a community fork of it optimized for the BC-250.
Here’s what unlocking 40 CUs does for current models. The author of the akandr/bc250 guide ran them in llama.cpp on the same board before and after the unlock:
| Model | Generation, tokens/s | Prompt processing, tokens/s |
|---|---|---|
| gpt-oss-20b | 66.1 → 87.5 (+32%) | 181.0 → 248.3 (+37%) |
| DeepSeek-R1 14B | 21.2 → 30.4 (+43%) | 98.0 → 140.5 (+43%) |
| Qwen3-Coder 30B | 57.7 → 76.7 (+33%) | 178.2 → 264.6 (+48%) |
| QwQ 32B | 9.6 → 14.9 (+55%) | 47.9 → 74.8 (+56%) |
| Granite 4.0 Tiny | 104.2 → 129.2 (+24%) | 510.6 → 765.0 (+50%) |
Home servers and clusters. Every board is a standalone computer with its own CPU and gigabit networking. Some people build a homelab cluster out of several BC-250s, others run a single one as a server for files, containers or that same local model. There are downsides in this role as well: IOMMU is broken, so passing devices through to virtual machines doesn’t work, and the idle power draw adds up to a noticeable electricity bill after a year of running 24/7.
Hardware hacking. For many owners, this is the main attraction. People are still figuring the BC-250 out: reverse-engineering the power management controller firmware, finding hidden settings, writing drivers. With a small mod, the I²C header lets you pull telemetry from the VRM controllers and watch voltages and currents in real time. The board also has a JTAG debug header and an LPC header. The hottest topic right now is getting the hardware video decoder working: enthusiasts can already run their own code on the SoC’s power management controller and appear to be close to getting it working. That’s exactly how the core and CU unlocks were found, and it may well not be the last discovery.
AMD BC-250 Pros and Cons
Pros
- A lot of hardware for little money A complete computer with graphics on par with the RX 6600–6600 XT, or the RX 6700 after the unlock, for the price of a used graphics card.
- 16 GB of fast memory GDDR6 at 448 GB/s, same as the PS5, and you can split it between system and graphics any way you like.
- Local AI Fits models that are too big for an 8 GB graphics card, with decent generation speed.
- Hidden potential Two more cores and 16 compute units can be unlocked. On a lucky board that means up to 28% more FPS in games.
- Hardware ray tracing Cyberpunk 2077 with RT lighting and FSR hits 50–60 FPS at 1080p.
- A console for the living room Steam, Proton, a Steam Deck-style game mode and emulators all the way up to PS3.
- Customization and community Over a hundred printable cases, cooling and firmware mods, and new scripts and fixes coming out almost every week.
Cons
- Linux only There’s no Windows graphics driver, and many anti-cheat games like Fortnite and Valorant won’t run.
- Not plug-and-play BIOS, case, cooling and power are all on you, and you should be ready for odd bugs in some games.
- Weak CPU A console Zen 2 at 3.5 GHz with a cut-down FPU, and at 1080p games often hit its limits.
- 16 GB for everything The memory is shared between system and graphics, and heavy games or 4K can run out of it.
- Power-hungry 60–85 W at idle, up to 235 W under load, and more with an unlock.
- No sleep, no hardware video Shutdown and reboot are your only options, and YouTube and movies run on the CPU.
- Slow M.2 slot PCIe 2.0 x2 caps SSD speed at about 1 GB/s.
- Used mining hardware No warranty. None at all.
- Prices have already climbed Not long ago boards went for $80–100; now the going rate is $150–200.
Where to Buy a BC-250 and What to Look For
You can’t buy a BC-250 new: every board on the market is ex-mining, pulled from dismantled rigs. Prices swing literally from week to week. After videos from big YouTubers in late summer 2026, the price went up to around $200 and boards were selling out instantly. The main places to look:
- AliExpress. Boards shipped from China, where most of the supply came from. At the time of writing (September 2026) they go for about $180–200, but with coupons and cashback you can get one for less.
- eBay. The biggest selection. Prices are about the same, but some sellers offer boards that have already been unlocked.
- Local classifieds. Facebook Marketplace and similar sites sometimes have them for less, and you may get to check the board before you pay.
What to Check Before Buying
- Condition. These boards ran around the clock for years. Look closely at photos of the power connector for any signs of melting or discoloration, and check the heatsink for corrosion. If the photos are blurry or there are only a couple, ask for new ones.
- What’s in the box. An SSD, PSU and case in the bundle are convenient, but work out what they’d cost on their own. Ready-built BC-250 “Steam Machines” sell for $500 and up.
- “Unlocked” boards. Since unlocking is a lottery, a board with all 40 CUs confirmed working really is worth more. But only if there’s proof: ask for a screenshot showing the number of active CUs and find out what clock speed the board is stable at. “Already unlocked” with no details means nothing. Anyone can switch the unlock on; guaranteeing it’s stable is another matter.
- Returns. Buy from sellers who accept returns. With used mining hardware and no warranty, that’s your only safety net.
FAQ
Can I install Windows on the BC-250?
You can, but there’s little practical point, since there’s no graphics driver for it.
Can I install SteamOS on the BC-250?
Yes, the real SteamOS installs from the Steam Deck recovery image, and community scripts add the governor and the unlock. But Valve doesn’t officially support the board, and updates occasionally break the system.
Can I add a graphics card to the BC-250?
There’s no PCIe slot for one, and the only M.2 slot gets just two PCIe 2.0 lanes, so even with an adapter it isn’t worth it.
Can sleep mode be fixed?
Not yet. The SoC’s power management controller comes from the console: Sony reworked it for the PS5’s rest mode, and it doesn’t understand AMD’s standard commands. Enthusiasts are digging into its firmware and trying to get at least some form of sleep working, but there’s no ready solution, so for now you can only shut down or reboot.
Can I do without a 3D printer?
Yes. You can order a case or shroud from a print service, or buy a finished one on Etsy or eBay. For your first tests, the bare board on a desk with a single 120 mm fan on the heatsink is enough.
Does the BC-250 have HDMI and Wi-Fi?
No. The only video output is DisplayPort 1.4, so you’ll need a DisplayPort-to-HDMI adapter for a TV. There’s no Wi-Fi or Bluetooth either; people add them with a USB adapter.
Is there a 3.5 mm headphone jack?
No. Audio goes over DisplayPort, either to the monitor’s speakers or to a TV through an HDMI adapter. It works properly on kernel 6.19.10 and newer. If you need headphones or speakers, the simplest fix is a cheap USB sound card.
Is unlocking safe, and can it be undone?
The software unlock for cores and compute units is fully reversible: if something goes wrong, you just turn it off. The main risks are extra heat and power draw, plus the chance of hitting cores or CUs that really are defective. So test everything after unlocking, and only flash a BIOS with the core unlock once those tests pass.
Do I need to know Linux?
If you’ve never used Linux and have no interest in picking it up, a ready-made mini PC or a console is the better choice. But if you enjoy learning and don’t mind messing with firmware and setup, the BC-250 makes a great first project: the community docs are detailed, and people on the forums are always happy to help.
Verdict
The BC-250 is one of the most unusual pieces of hardware of recent years: a PS5 die that didn’t make it into the console, was sent off to mine crypto, and then got turned into a gaming PC by the community. For the price of a used graphics card you get RX 6600–6600 XT class graphics, 16 GB of fast memory and a shot at RX 6700 performance if the unlock goes your way.
It’s worth buying if:
- you enjoy building, tuning and tinkering with hardware;
- you’re ready to live in Linux or want to learn it;
- you need a cheap gaming PC or a home server for AI models.
Skip it if:
- you want a computer that just works out of the box;
- you play online games with anti-cheat;
- your workloads need more than 16 GB of memory.
The key thing to understand about the BC-250 is that it isn’t a finished product, it’s a project. Whatever you save in money, you’ll spend in time on building and setup. But for people who enjoy that, it’s the whole point.
Useful Links
Most of the up-to-date information on the BC-250 lives in the community docs and on Discord, so those are the best places to start.
Documentation and Community
- AMD BC-250 Documentation: the main community documentation. Specs, pinouts, BIOS flashing and Linux setup for every distro.
- BC-250 Unofficial Community Guide: a collection of benchmarks, tips and fresh findings from Discord and Reddit, updated almost every week.
- bc250-documentation: the original documentation on running the BC-250 as a desktop; much of the main docs grew out of it.
- BC-250 community Discord: the place to ask when something isn’t working.
- r/BC250Gaming: builds, discoveries and current prices.
BIOS, Unlocking and Utilities
- bc250-bios: modded BIOS firmware.
- kenavru/BC-250: a kit for flashing the BIOS from a USB drive.
- Forbidden-Darkness UEFI Firmware Menu Script: MeiMeiDXE firmware with the core unlock, flashed through a boot menu that also handles BIOS backup and restore.
- cyan-skillfish-governor-smu: the GPU frequency governor.
- bc250-acpi-fix: an ACPI fix for CPU idle states and clocks, for both 6 and 8 cores.
- bc250-cu-live-manager: unlocks compute units on the fly, no kernel patch needed.
- bc250-40cu-unlock: the original 40 CU unlock via a driver patch, with scripts for testing each cluster.
- bc250-core-cu-unlock: unlocks all 8 CPU cores with a script from Linux, core test included.
- bc250-gfx1013-fix: kernel and Mesa patches that bring back async compute.
Auto-Setup Scripts
- gennro/bc250-toolkit: automatic CachyOS setup, including the 40 CU unlock and the governor.
- redbeard1083/bc250-toolkit: another script collection for CachyOS.
- bazzite-bc250-toolkit: the same idea for Bazzite.
Gaming
- Are We Anti-Cheat Yet?: a database of anti-cheat games and their Linux status.
- GamingOnLinux Anti-Cheat List: another up-to-date anti-cheat compatibility list.
Local AI
- akandr/bc250: a detailed guide to running local LLMs on the BC-250, with benchmarks before and after the unlock.
- llama.cpp-bc250: a llama.cpp fork optimized for the BC-250.
Reviews and Benchmarks
- Tom’s Hardware: Benchmarking AMD’s BC-250: an in-depth review covering setup, unlocking and a comparison with the Steam Machine.
- Old Lamer: Full Guide how to make Steam Machine from AMD BC-250: a detailed video guide to building a Steam Machine out of a BC-250.
- Chips and Cheese: The Nerfed FPU in PS5’s Zen 2 Cores: a deep dive into the cut-down FPU, tested on none other than the BC-250.
3D-Printable Cases
- Case gallery in the documentation: over 145 models with photos and filters by PSU type.

Written by
Senior Hardware Specialist proving you don't need top-tier gear to game. Expert in smart upgrades and budget-friendly PC restoration.