Table of Contents
How it works
Some Chinese X79 boards ship with a fully-functional memory timings menu that the manufacturer never removed — it’s simply hidden from the setup GUI by an access-control flag inside the BIOS’s menu structure. The menu itself, and the code behind it, are both already there; they just aren’t flagged as visible. That makes this a different kind of mod from the RAM/CPU multiplier patches in our other guide: instead of editing a firmware module’s machine code with a hex editor, you’re changing a single setting inside the BIOS’s setup-menu definition using AMIBCP, and nothing else in the firmware is touched.
Before you start
- Back up your full BIOS image (8 MB) using any method supported by your board — either using software tools (Intel FPT, AFUWIN, AFUDOS) or an external SPI programmer.
- Confirm your flashing method in advance. Ensure you can both read from and write to your chip using your tool of choice before applying any mods.
- Download the required software.
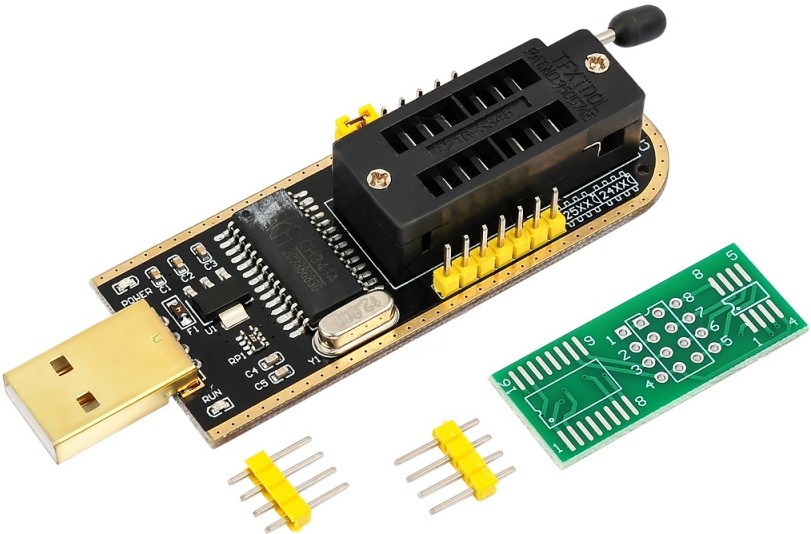
Required software
- AMIBCP 4.55 — this is the only editing tool you need for this particular mod.
Step 0 — Dumping your current BIOS
Before modifying anything, pull a full dump of the BIOS currently installed on your board and put it somewhere safe. This is your emergency recovery copy — if a flash fails, this is what you restore to get back to a working state (via an SPI programmer, if the board no longer boots).
Step 1 — Check whether a hidden timings menu exists
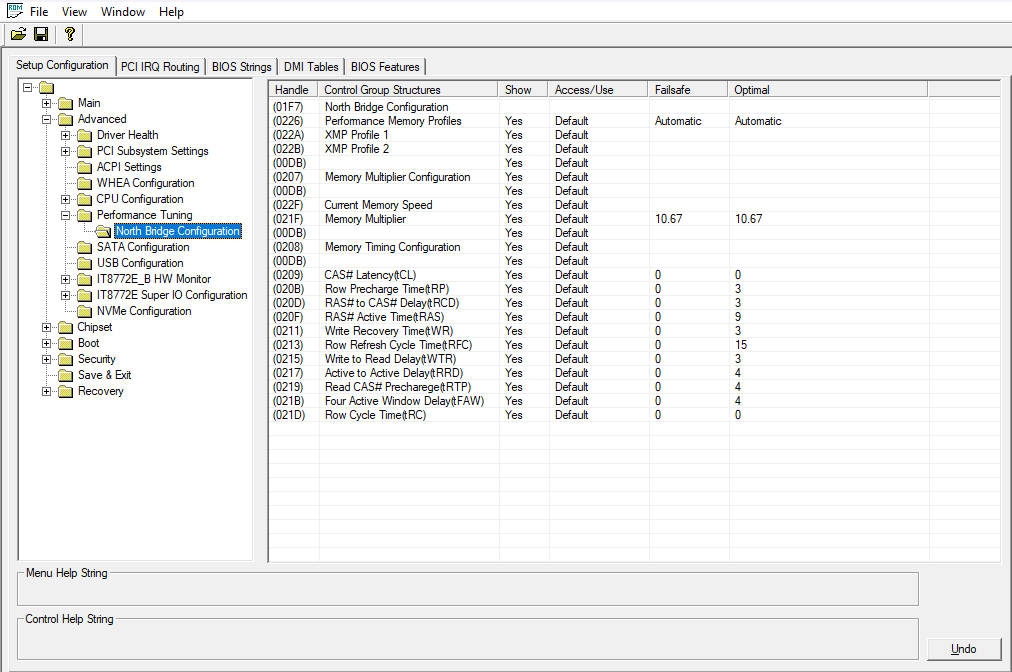
Open your BIOS in AMIBCP, go to the Setup Configuration tab, expand Advanced, and check for a Performance Tuning entry containing a North Bridge Configuration menu. If you see a timings menu like the one in the screenshot below, your BIOS already contains the menu we’re looking for, and you can move straight on to unlocking it.
Step 2 — Making the menu visible
- Select the Advanced folder. In the table on the right, find the row Performance Tuning and change its value in the Access\Use column from Default to USER.
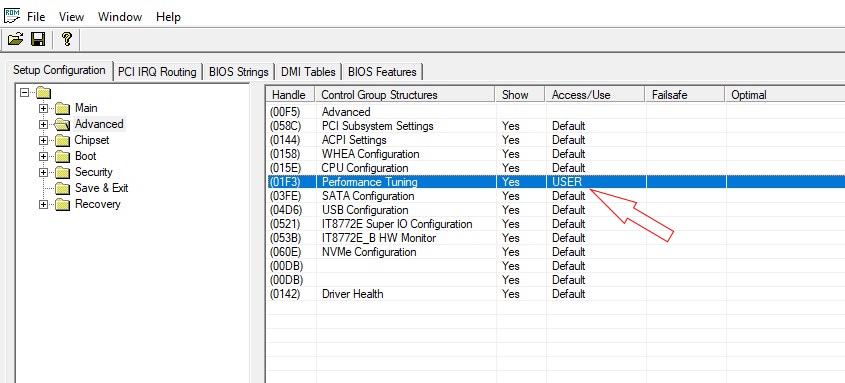
Advanced → Performance Tuning: Access\Use set from Default to USER. - Now expand Performance Tuning and select it. In the table, find the row North Bridge Configuration and change its Access\Use value from Default to USER as well.
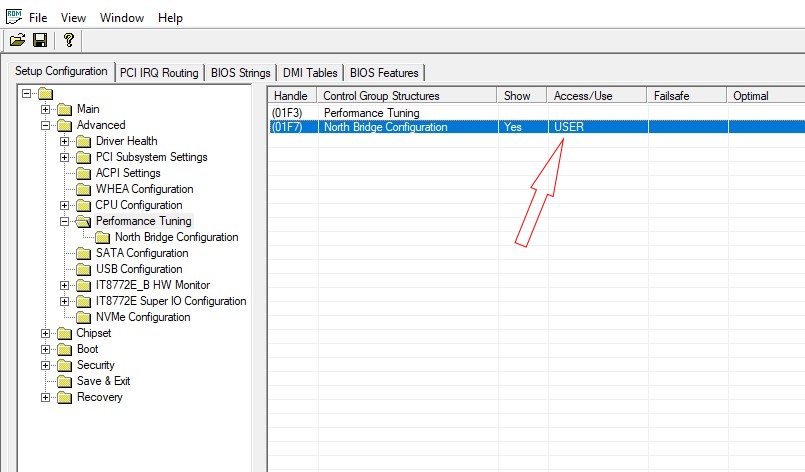
Performance Tuning → North Bridge Configuration: Access\Use set from Default to USER. - Expand North Bridge Configuration and select it. In the table, change the Access\Use value for each remaining row to match the reference screenshot below exactly — don’t skip any, and don’t change values that aren’t shown there.
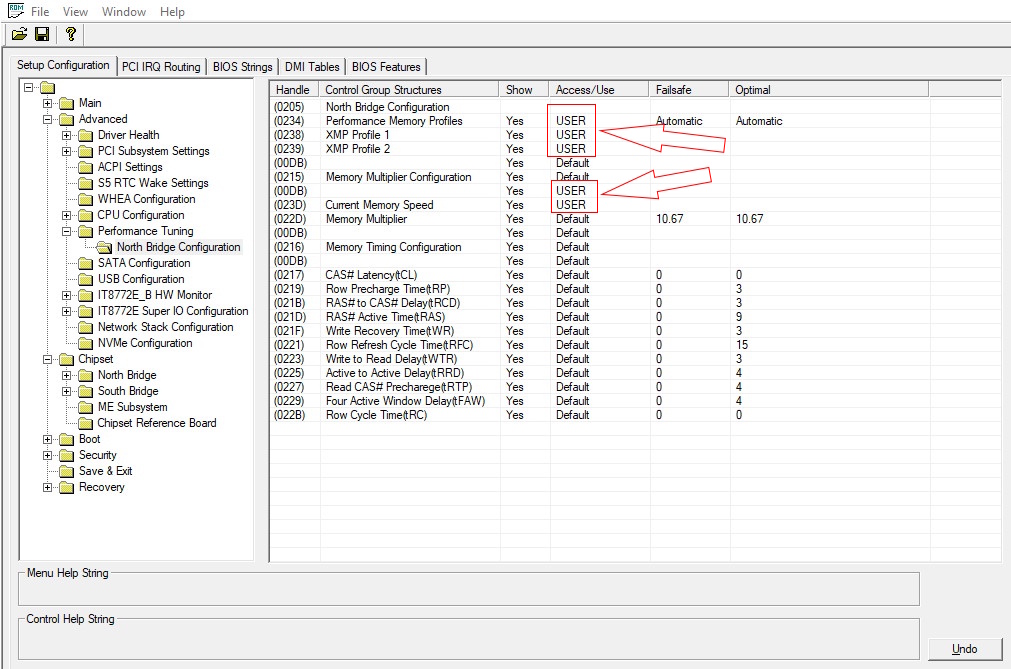
North Bridge Configuration — set the Access\Use column to match this reference exactly. - Save your edited ROM: File → Save as, and give it a distinct name so you don’t confuse it with your original backup.
- That’s it. All that’s left is to flash your modded BIOS using any method suitable for your board.
Step 3 — Post‑flash checks
- Power off completely, clear CMOS (jumper or battery), then power on and enter the BIOS.
- Load Optimized Defaults, Save & Exit, then re‑enter the BIOS.
- Navigate to Advanced → Performance Tuning → North Bridge Configuration and confirm that the menu you unlocked in AMIBCP is now visible.
- To enable manual timing adjustments, set Performance Memory Profiles to Manual.
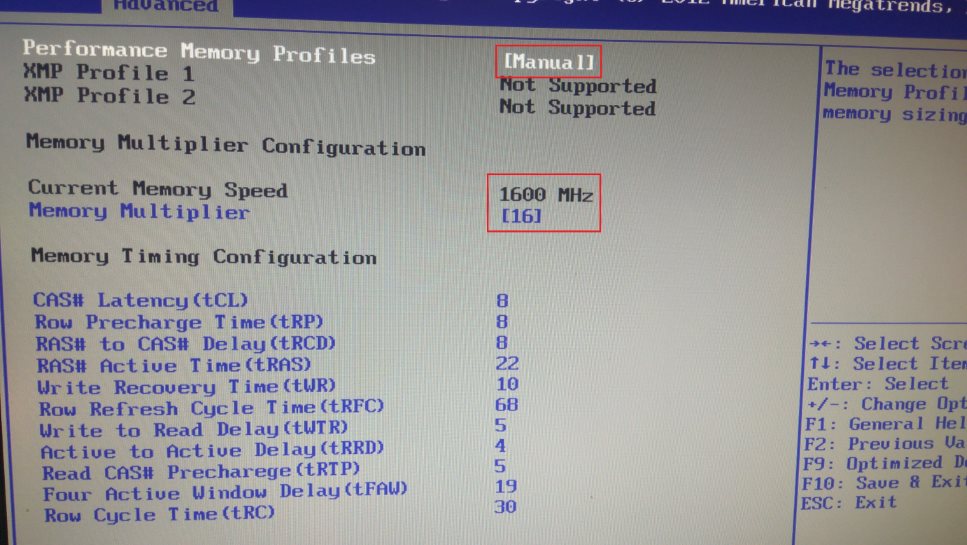
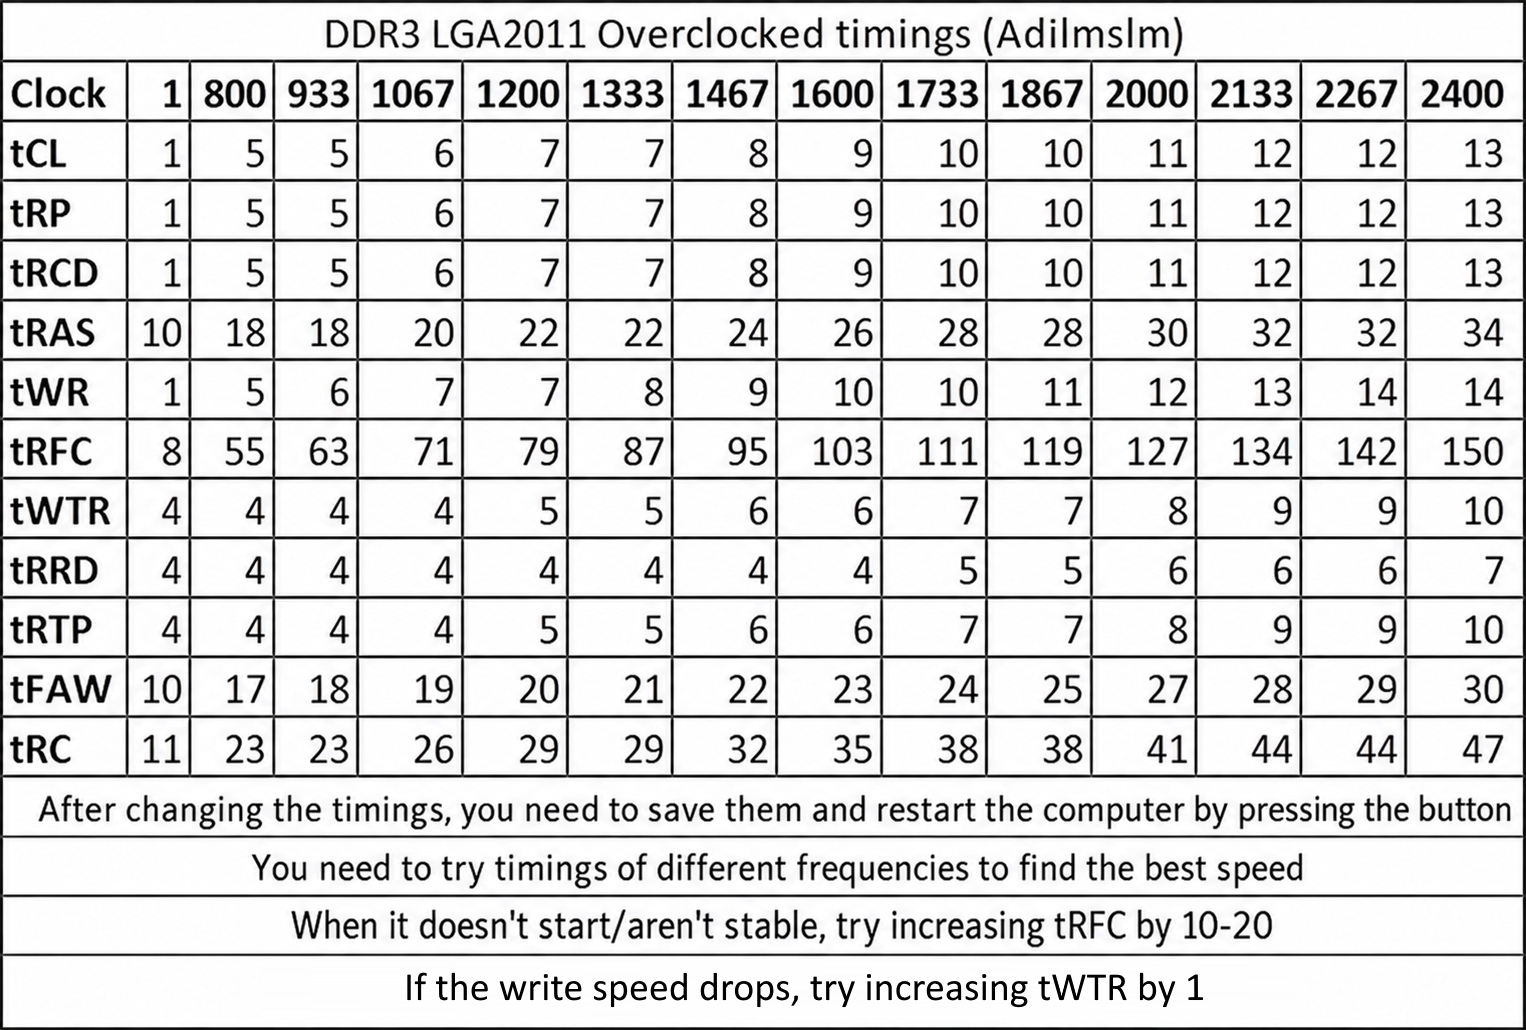
- Now you can apply the timings you need. If you’re not sure which values suit your memory, use the table below.
- Save the BIOS settings, boot into the OS, and check if your new values were actually applied using tools like CPU-Z or AIDA64. Once verified, run a stress test (such as TestMem5) to confirm system stability.
Basic DDR3 timings table for X79 systems
Troubleshooting
- Menu still not showing up after flashing? Make sure you loaded Setup Defaults after the flash — some boards need this before newly-exposed menu items appear.
- Board won’t boot after flashing (no POST, powers off after a couple of seconds): clear CMOS first. If that doesn’t bring it back, you’ll need an external SPI programmer to reflash your original backup.
Source material and screenshots: e5450.com.

Written by
Senior Hardware Specialist proving you don't need top-tier gear to game. Expert in smart upgrades and budget-friendly PC restoration.